Silhouette UK Blog | Showered With Love | Stephanie Squires
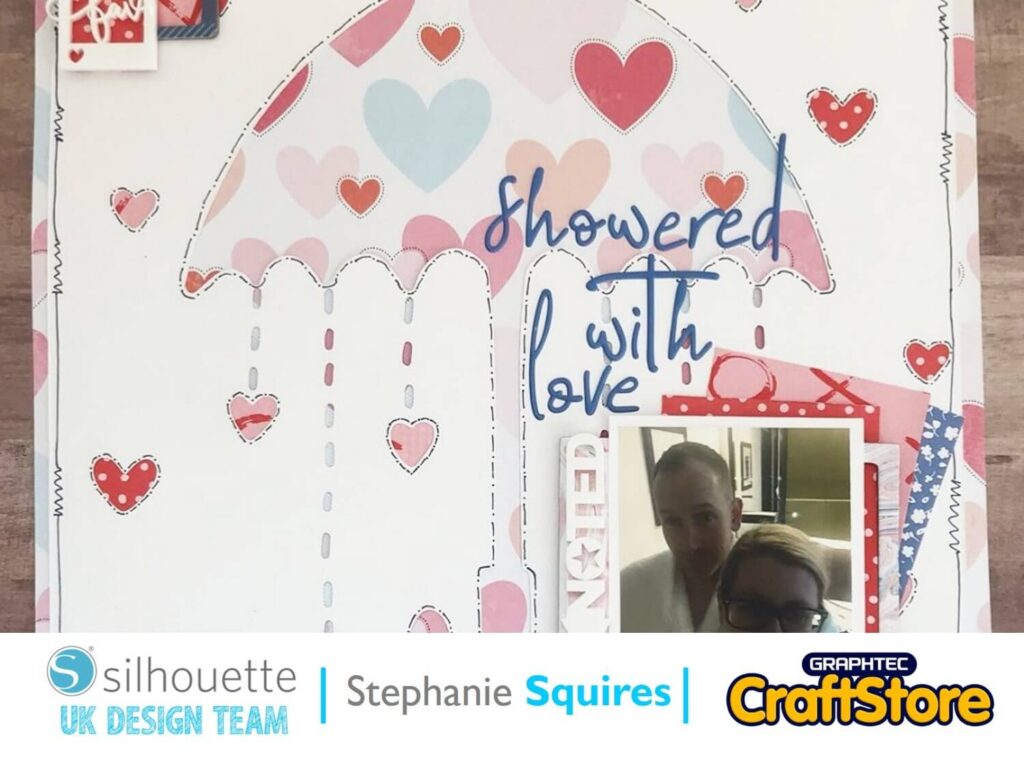
Silhouette UK Blog | Showered With Love | Stephanie SquiresScrapbooking With Steph Hello and welcome to todays blog post, Showered With Love ♥ So today I have made a 12…
PLEASE NOTE THAT THE OFFICE WILL BE CLOSED FROM 12PM FRIDAY 20TH DECEMBER 2024 AND WILL RE-OPEN ON THURSDAY 2ND JANUARY 2025
ORDERS FOR DELIVERY PRIOR TO CHRISTMAS WILL NEED TO BE SUBMITTED BY 2.30PM ON THURSDAY 19THDECEMBER 2024.
ORDERS RECEIVED AFTER THIS TIME AND DATE WILL BE DESPATCHED ON THURSDAY 2ND JANUARY 2025.
Merry Christmas & A Happy New Year to all our customers. Thank you for your continued support.
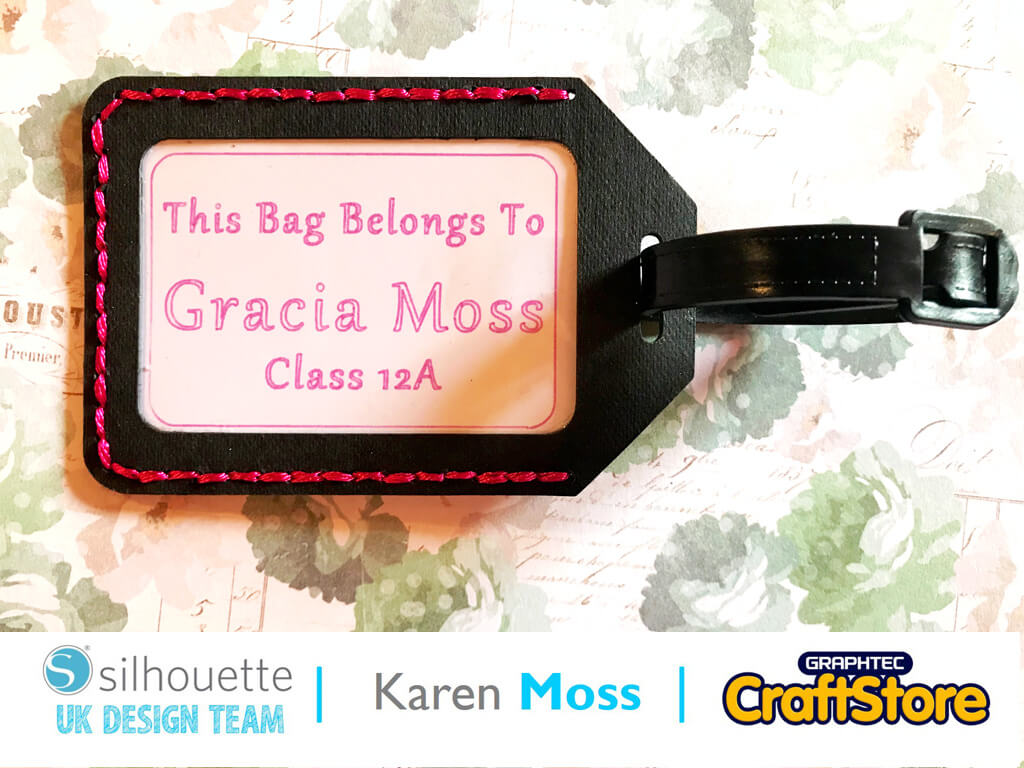
As the time for the kids to return to school gets closer it’s time to get school bags sorted.
With this in mind I have made a bag tag to make it easy for a child to identify their bag.
I started by choosing a tag shape and resizing it to 2.75in wide.
I then mirrored it to the right to create two tags.
The next step was to cut a section for the name of the child. I used a rounded corner rectangle.
I also added holes for stitching – see this blog post for instructions on how to do this.
I thought it would be fun to add a little phrase to the back in glitter HTV and found the perfect one.
My machine is a Silhouette 3 and this gives you the ability to cut several different materials in one go as you can change the line colour and set the correct cutting settings for each material according to that colour.
Another helpful feature in the new software is the ability to add ‘sticky notes’ to a design which act as reminders.
I allocated cut settings by the colours I had chosen and used ‘Heavy Cardstock’ for my piece of acetate.
I put a pink glitter sketch pen into the right tool holder and off it went.
All my pieces were cut/sketched in one go with the machine pausing to change settings automatically.
To construct my tag I used strong clear glue to stick the acetate to the inside of the name side.
I heat pressed the phrase onto the other piece and used shiney pink embroidery floss to stitch the two pieces together.
I found a little strap (from an old luggage tag) and after adding the name card my tag was complete.
This was such a quick and fun project.
I am aware that as the tag is made from faux leather paper it is not particularly durable but is a nice little temporary addition to any school bag.
– Karen Moss –
• Design Used: Tag
Design Store Artist: Pebbles
Design Store ID: 20564 > Download
• Design Used: The Unicorn Ate My Homework
Design Store Artist: Sophie Gallo
Design Store ID: 199339 > Download