Sale!
Brother ScanNCut DX Standard Tack Adhesive Mat
Price range: £19.80 through £33.74
Select options
This product has multiple variants. The options may be chosen on the product page
PLEASE NOTE THAT THE OFFICE WILL BE CLOSED FROM 12PM FRIDAY 20TH DECEMBER 2024 AND WILL RE-OPEN ON THURSDAY 2ND JANUARY 2025
ORDERS FOR DELIVERY PRIOR TO CHRISTMAS WILL NEED TO BE SUBMITTED BY 2.30PM ON THURSDAY 19THDECEMBER 2024.
ORDERS RECEIVED AFTER THIS TIME AND DATE WILL BE DESPATCHED ON THURSDAY 2ND JANUARY 2025.
Merry Christmas & A Happy New Year to all our customers. Thank you for your continued support.
`
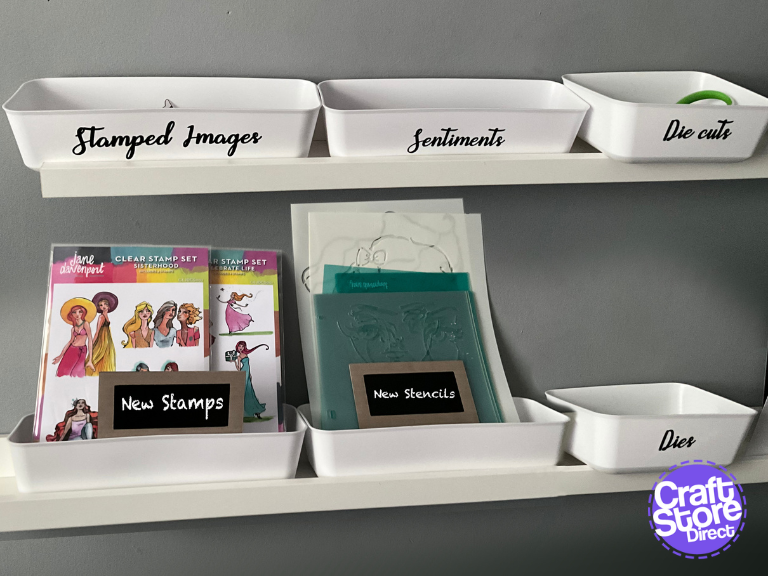
It’s that time of year again when we all want to get organised, clean and prep for the summer ahead. Here’s a few organisational ideas that you can adapt for your storage.
Craft Materials We Used:
• Brother ScanNCut SDX1200
• Standard Tack Cutting Mat
• SDX Vinyl Autoblade Kit
• Brother Print To Cut Add-On for Canvas Workspace
• Silhouette Printable Magnet
• Silhouette Chalkboard Material
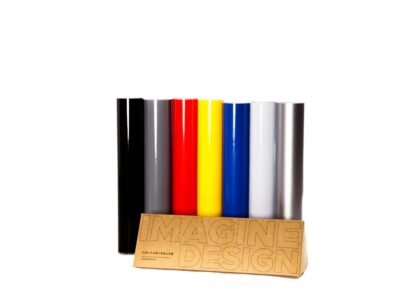
• Colour + Shape Adhesive Vinyl
• Silhouette Wood Sheets
Here are the additional tools you need…
• Plastic Storage Tubs
• Mobile Storage Trolleys
• Containers
• Jars or Boxes for Upcycling


To help me stay on track, it was easier to work in CanvasWorkspace. I’m using the desktop version so I can use the fonts installed on my Mac/PC.
For each area you want to label, create a new temporary box which gives you the maximum size of your label. Try to make sure your surfaces are flat for best adhesion long term.
For temporary labelling see STYLE 2 below.
Into each of these boxes, using the Text Tool [T], click in the box and type your chosen text. Hit [Enter] to finish typing. You can only type one line at a time.
Choose your font for your label. Choose a font with a bold look with none or few thin sections. This will help you when cutting your design. If it is unavoidable, then swap to the manual cut blade or the vinyl autoblade if you have one for best results.
If you are using a script style font, adjust the character spacing so the characters overlap throughout your words. You can then weld your characters together.
If you are losing small details like dots of i’s, for example, then produce your artwork outside of CanvasWorkspace, weld together, export to SVG and import into CanvasWorkspace.
You can use the guide box as a weeding box, or, on SDX machines, add a weeding box on your machine in the cut settings.


Vinyl can be one of the trickier things to cut on the ScanNCut when you are first starting out, but it is actually very forgiving. The vinyl itself will enable you to cut finer details than you would out of card for example. The art to it is getting the perfect cut depth.
On CM machines, you want to drop your pressure right down to -9 and adjust your blade so that it cuts through the vinyl but scores the backing as little as possible. Blade depth for vinyl is typically 1-2 with some thicker glitter vinyls reaching 3.
On SDX machines, you want to use the half cut function, and I’ll typically leave the half cut pressure on auto. You can then adjust your cut using the cut amount function instead. If you don’t feel confident adjusting the cut amount, adjust your half cut pressure to -9 and test cut. Slowly, increase the half cut pressure until you get a great test cut. You may still find it necessary to move the pressure up one notch when cutting your final design.
The Colour+Shape Vinyl I’m using is fabulous for cutting on your ScanNCut.


Firstly, we need to weed our cut vinyl design ready for application. For text designs, I like to remove the centres of letters, numbers and punctuation first. Then, peel away the weeding box and trim ready for applying transfer tape.
Cut a piece of transfer tape to size, and adhere over your design. Peel away the backing paper from the back of your design rather than trying to lift the vinyl off the backing. Much easier this way for detailed designs.
Clean the surface you are applying the vinyl to with a little alcohol – even an optical wipe would do. Allow to dry and then move onto the final application.
Align over your surface, and press down. You can use a little backing paper to help you align the label. Take your time now to get the application perfect.


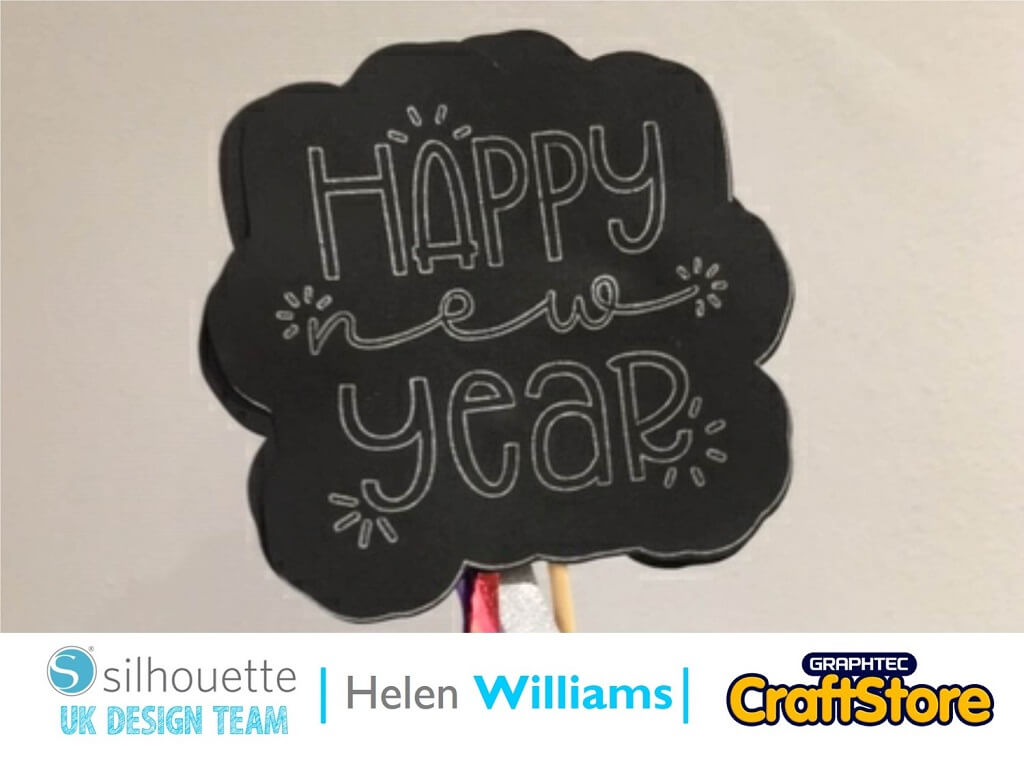
Sometimes, permanent adhesive labels are not the best option – due to placement or contents. Here’s another idea for you: movable labels.
Think of these as plant labels for your supplies. They can move with the contents.
Measure the size of the label you want to create. Cut this from greyboard and also from the self-adhesive chalkboard material.
Add a second rectangle using either offset (for a fixed border) or just another shape from the Basic Shapes section.
Cut this from the Silhouette Wood Sheet using the standard autoblade (SDX models) or the Deep Cut blade (CM models).
Firstly, apply the chalkboard piece to your greyboard; then, add your frame piece. You can cover the back of your label with a vinyl or other material backing. Self-adhesive velvet works great for projects like this if your tubs are going against a painted wall or surface.
You can also add a stem to your greyboard layer to support your label above the contents of your container.
Use a piece of chalk or a chalk paint pen to write onto your chalkboard panel.


Finally, we can create our own magnetic signs using Silhouette Printable Magnet sheets and the Brother Print to Cut add-on for CanvasWorkspace. SDX users can benefit from
Create the artwork for your labels using an image editing package for best results. Measure the magnet you want to create and create the artwork 3mm larger on all sides. Use a resolution of 300dpi if your package gives you this option. You could also use online services such as Adobe Express or Canva.
Set your artboard to Letter and turn on Registration Marks under the Artboard panel on the right of the screen. Import your image in JPG or PNG format into CanvasWorkspace using either [File]-[Import]-[From your Computer] or through the image tracing function. The image tracing function is better for shaped designs; while the import option is better for basic shape designs (square, rectangle, circle or oval).
Image tracing will automatically find the edges; for some designs Enhanced Image Tracing will work better. You can always tweak these following this method if required.
Importing will just bring in the image and you will need to add a cut line manually. For basic shapes, just bring in the shape you want and size it to your image. You can also use the Path Tool [P] to manually trace any areas you need to tweak.
Once all your outlines are in, select them all and offset inside 3mm and choose the option to delete the original lines. Group them all together.
Export your PDF file (with cut lines hidden) and print this from Adobe Acrobat or other PDF reader; you can also print from Affinity Designer, Adobe Illustrator etc. where you need greater control over colour output). Follow the instructions for your printer to print onto the correct side of the magnetic sheet in your manual feed.
Next, hide the imagery and show the cut lines in CanvasWorkspace. Send the design through to your ScanNCut, and let your SDX machine do the rest.
On CM machines, hide the registration marks and export to your machine. Retrieve the data and use Background Scan to align the cut lines.

Once you get used to using these core techniques you can create stickers, magnets, and even pins for all your organisational needs.
– Natalie x

Price range: £19.80 through £33.74
Original price was: £499.00.£449.00Current price is: £449.00.
Original price was: £55.00.£49.50Current price is: £49.50.
Price range: £7.23 through £14.88

