
Back-To-School | Cherylann McCool | Silhouette UK Blog
Back-To-School | Cherylann McCool | Silhouette UK BlogBack-To-School Desk Tidy | Silhouette Faux Leather Sheets Hi Cheryl here again. Boy oh boy how quick have the school holidays gone, in…
PLEASE NOTE THAT THE OFFICE WILL BE CLOSED FROM 12PM FRIDAY 20TH DECEMBER 2024 AND WILL RE-OPEN ON THURSDAY 2ND JANUARY 2025
ORDERS FOR DELIVERY PRIOR TO CHRISTMAS WILL NEED TO BE SUBMITTED BY 2.30PM ON THURSDAY 19THDECEMBER 2024.
ORDERS RECEIVED AFTER THIS TIME AND DATE WILL BE DESPATCHED ON THURSDAY 2ND JANUARY 2025.
Merry Christmas & A Happy New Year to all our customers. Thank you for your continued support.
Hello again!!
Vicky here from Cut That Design!
Today, I’m showing you how I have made this Horse Carousel Cupcake Topper. This is a cute and easy project to do by yourself, or you could even get the kids involved.
Some extra crafty bits you will need to complete the project (see list of Silhouette items you’ll need below)
• Glitter Cardstock
• Glue Stick
• Craft Sticks

Once I’d decided on the design I wanted for my Cupcake Topper, and the colours of cardstock for the backing, I decided I wanted to try and cut the different colours of the Silhouette Cardstock at the same time, to save me time going back and forth to my machine.
With scissors I cut the Silhouette Cardstock to a few CM bigger than each of the backing pieces as shown on the picture.
I then decreased the transparency in the Page Setup panel, so it would show the lines of the mat on the screen, which then made it easy for me to place the Cardstock on the mat in the correct place.
Once I’d placed the card stock on the mat (as shown below), I loaded up my Silhouette and sent it to cut.
The settings I used for this one were:
Blade Depth: 4
Force: 29
Speed: 3
Passes: 1
Although, I always like to advise that you do a test cut before attempting a project for the first time.


As you can see from this picture the Silhouette cut exactly where I wanted it too.
It was the first time I tried this method, and it worked perfect.
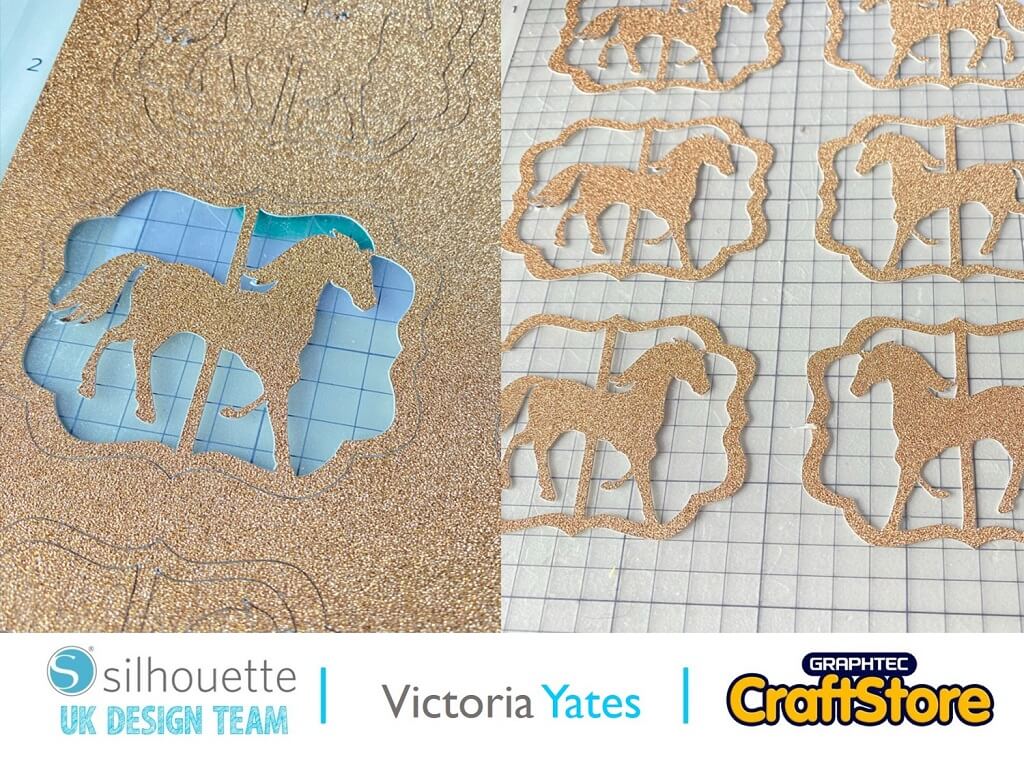
For the horses I couldn’t resist the chance of using more of my Glitter Cardstock.
However, before we get to that, I changed my page settings to Media Size: A4, and laced the horses on the page, I then duplicated them and Mirrored them (Right click, Flip Horizontally or Object, Mirror, Flip Horizontally)
The reason I have mirrored them is so they will be facing the same way when you look at them on each side of the topper.
Send them to cut using the glitter cardstock settings (again, do a test cut if you are cutting glitter cardstock for the first time):
Settings:
Blade Depth: 6
Force: 33
Speed: 3
Passes: 2
Once cut gently remove the horses from the mat, I used the Silhouette Universal Spatula for this.

Now it’s time to Attach all the pieces together!!
Using the adhesive backing of the coloured cardstock, I attached them to the Craft Sticks as shown.
I then attached the horses and used a glue stick to attach the horse to the non-adhesive side.

Look at how cute these have turned out! Sadly, I didn’t have any cupcakes in the house in order to display them as they should be used. So, if you do attempt this project or something similar, remember to treat yourself to a box of cupcakes!
I hope you’ve enjoyed this quick Cupcake topper project. You could even do a larger version for a larger cake!
Until next time.
Happy Crafting!!
– Victoria Yates xx –
• Design Used: Tag Carousel Horse
Design Store Artist: Nilmara Quintela
Design Store ID: 103600 > Download