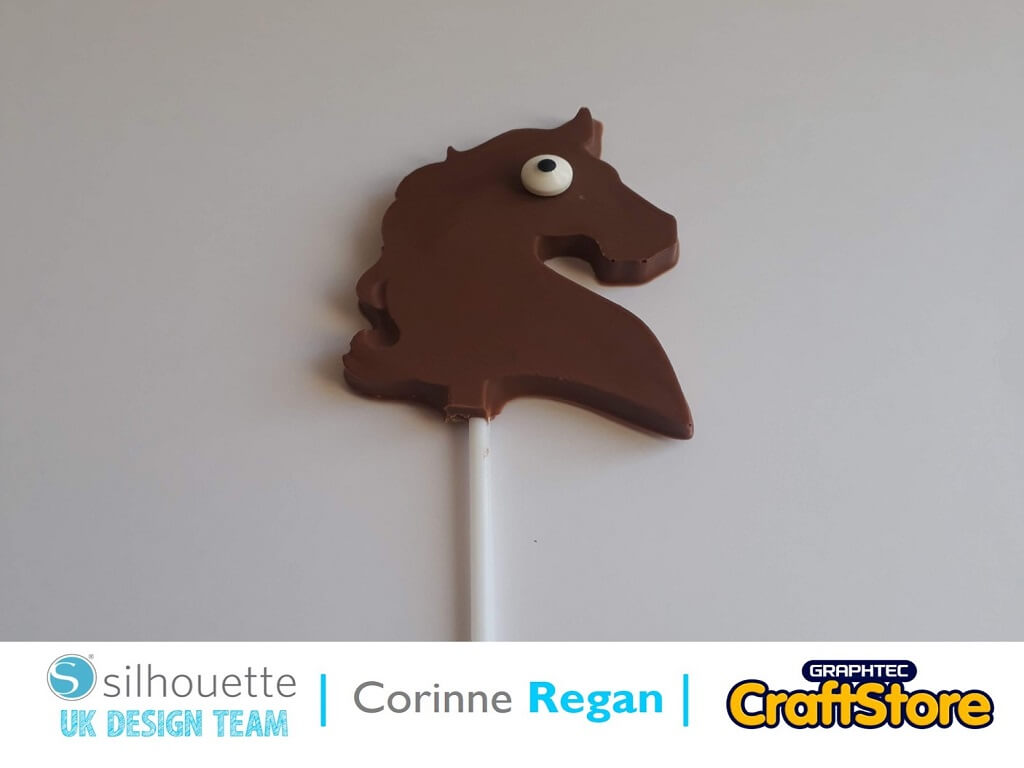
3D Printed Lollipop Mold | Corinne Regan | Silhouette UK Blog
3D Printed Lollipop Mold | Corinne Regan | Silhouette UK Blog3D Printed Chocolate Lollipop Mold Hi all, Corinne here today with a yummy looking 3D Printed Lollipop Mold. Getting The…
PLEASE NOTE THAT THE OFFICE WILL BE CLOSED FROM 12PM FRIDAY 20TH DECEMBER 2024 AND WILL RE-OPEN ON THURSDAY 2ND JANUARY 2025
ORDERS FOR DELIVERY PRIOR TO CHRISTMAS WILL NEED TO BE SUBMITTED BY 2.30PM ON THURSDAY 19THDECEMBER 2024.
ORDERS RECEIVED AFTER THIS TIME AND DATE WILL BE DESPATCHED ON THURSDAY 2ND JANUARY 2025.
Merry Christmas & A Happy New Year to all our customers. Thank you for your continued support.
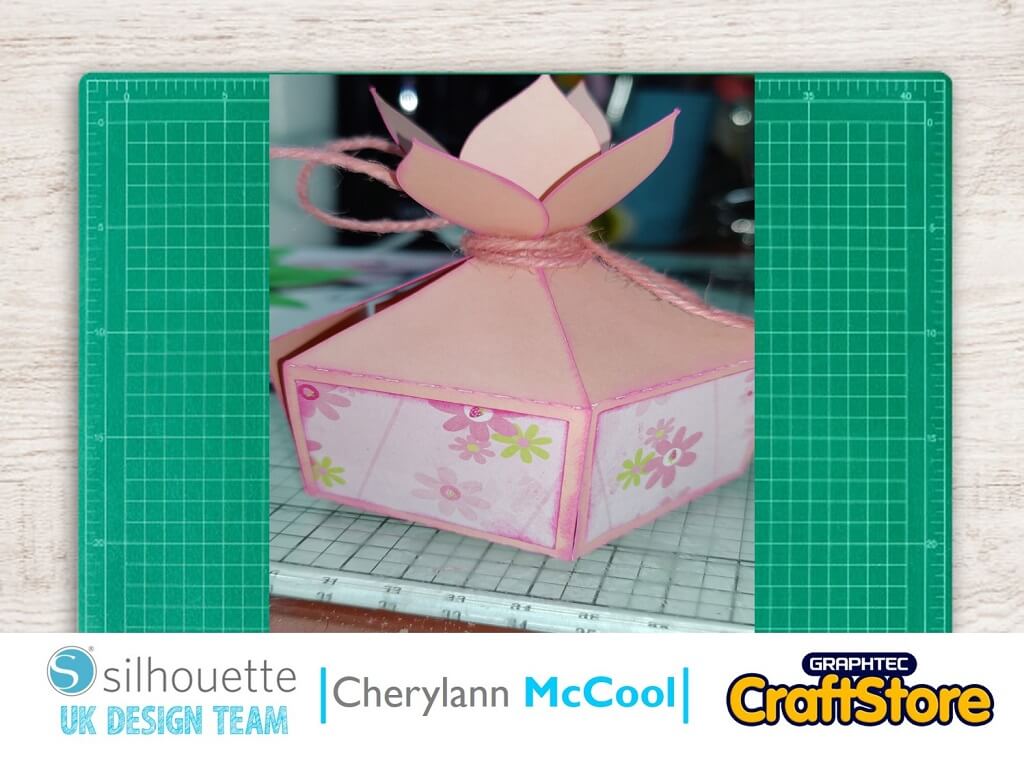
Hi it’s Cheryl here again.
I know lockdown hasn’t been easy for anyone so why not take up a new hobby and get yourself a Silhouette Cutting Tool so you can come join me in making this project for the mum’s in our lives.
• Silhouette Cardstock
• Patterened Paper
• String or Ribbon
• Ink Pads


In your software, click to open your file and in the design space you will see that your design file opens.
Now, all you have to do is decide on the size of mat you will need to use.
So now you want to look at the page Setup on the right hand side of your screen.
You want to make sure that your cutting mat and media size settings are correct for you.
With this file you will need to start with 12” x 12”.


Next you want to take away the lighter pink squares.
To do this click on the image until it brings up the black lines and then you want to right click here and choose ‘Ungroup’.
Next, hit enter and if you move your big shape away you can move your pink squares to the side of the mat and move the big image back into place.
Now you want to get ready to cut.
Select send up in the top right hand side of the screen and you will see your screen change here.
You want to change your material which is what you will be cutting then you will see the numbers in the middle section change (blade depth, cutting force, speed).
If you are happy with that then press the send button down at the bottom.
You will want to repeat these steps for the smaller pieces of paper.


Once you have all your pieces cut out then it’s time to put it all together.
I would start off by gluing your smaller pieces onto the box and then with a bone folder, burnish all the fold lines and pull the leaves up to form the box.
Finally, with a little length of string or ribbon, tie it around the box and let the top leaves fold down to create the box and that’s you done.
Once again I have loved making this, having the Cameo really helps if you aren’t great at working with patterns.
It’s also great for people who have problems with their hands so go give it a go.
Next time it’s time to start thinking about hiding the eggs and going for a fun hunt.
I hope you will come join me.
Bye for now!
– Cherylann McCool xx –
• Design Used: Pentagon Flower Box
Design Store Artist: Lori Whitlock
Design ID: 319510 > Download