Bespoke Cookie Cutters | Corinne Regan | Silhouette UK Blog
Bespoke Cookie Cutters | Corinne Regan | Silhouette UK BlogMermaid Cupcake Toppers Hi all I thought I would do something different to cookies today. I used the Silhouette Alta and…
PLEASE NOTE THAT THE OFFICE WILL BE CLOSED FROM 12PM FRIDAY 20TH DECEMBER 2024 AND WILL RE-OPEN ON THURSDAY 2ND JANUARY 2025
ORDERS FOR DELIVERY PRIOR TO CHRISTMAS WILL NEED TO BE SUBMITTED BY 2.30PM ON THURSDAY 19THDECEMBER 2024.
ORDERS RECEIVED AFTER THIS TIME AND DATE WILL BE DESPATCHED ON THURSDAY 2ND JANUARY 2025.
Merry Christmas & A Happy New Year to all our customers. Thank you for your continued support.
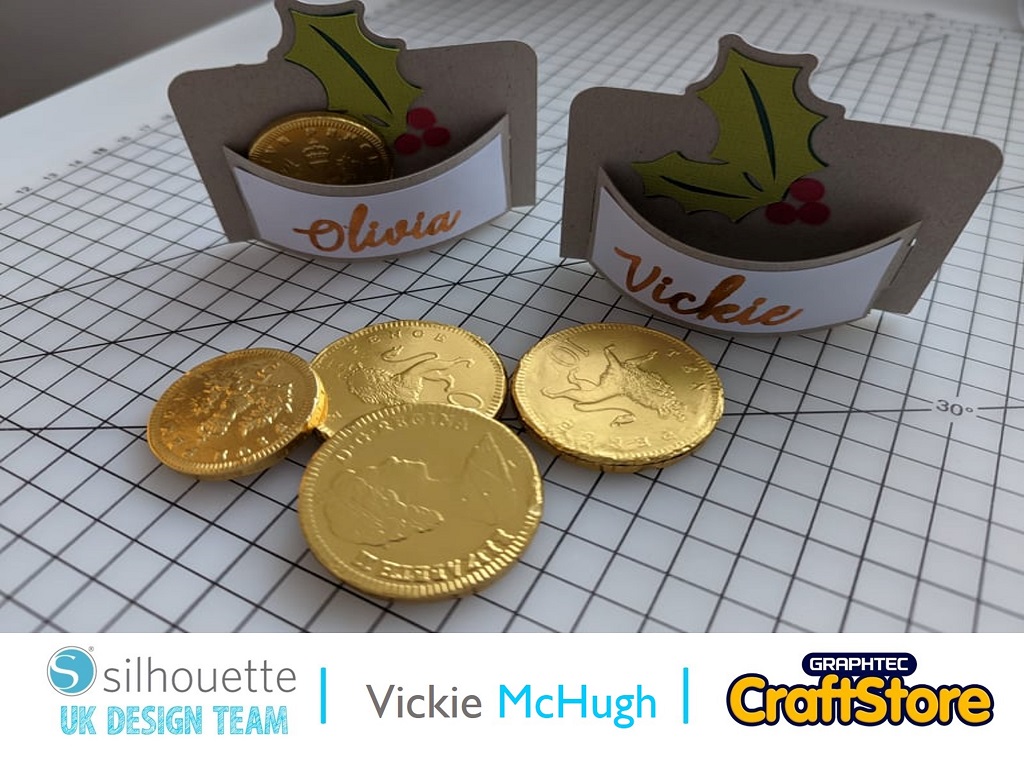

Hello everyone!
I cant believe that we are well into December and Christmas is around the corner.
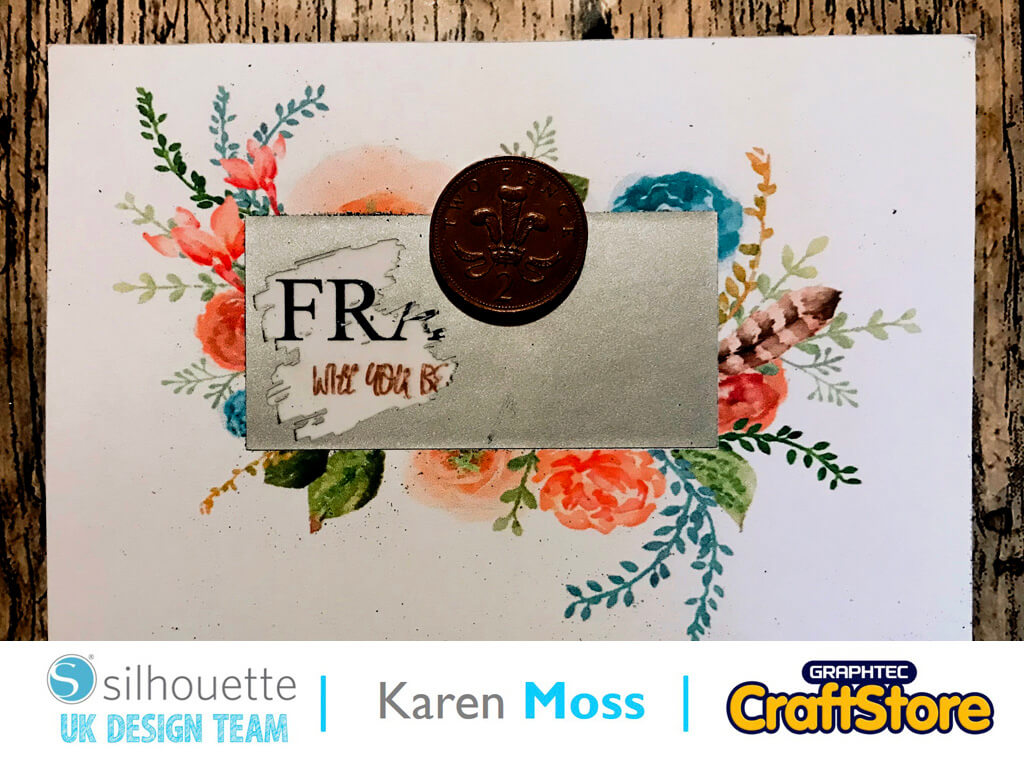
Today I am going to make some really pretty place card names for your Christmas day table.
I have chosen the holly leaves but there are lots of different styles in the Design Store.
I am also going to show you how to add a name on using Silhouette Embossable Foil. I am looking forward to using this as I have never tried it before.
Items I Used
• Silhouette Curio and cutting mat, im using the large 8.5×12”
• Silhouette Adhesive-Backed Textured Card bumper pack

Having looked in the Silhouette design store, there were so many Christmas table place cards, I struggled to choose.
In the end I went for “Flexi place card Christmas holly”.
Insert the design into silhouette studio by double clicking in your library
Ungroup the design by right clicking.
I am going to cut out the chip board first, so move every other piece off the mat.
I am actually using this as our christmas day table names so I am cutting out multiples.
Click on the Send tab and change the material to Chipboard. Click Send and Curio will cut out the design.
For cutting out the holly, I am using Silhouette Adhesive-Backed Textured Cardstock. When sending to Curio, don’t forget to change to material accordingly.


Now the exciting part, setting up for foiling.
I am going to use a plain white cardstock for this and stick it on with double sided tape or glue,
First thing to remember is to change to tool to the fine embossing tool (white)
Write the names using the text and text style tool.
Open the Emboss panel
Choose:
Deboss
Spiral embossing pattern
Adjust spacing to smallest or type 0.005
Click Send
Change to Deboss
Select material as Foil transfer sheets and make sure its showing as fine embossing tool
Click Send and watch the Cuiro do its magic.
Change the tool back to the cutting tool and changing the settings back to card stock, click Send and cut put the names


Now you have all the parts put them together by sticking the name section onto the front panel and the holly onto the back panel.
Then slot the 2 pieces together.
I have brought a little chocolate coin to put in the gap too, this can be placed in or secured with a little sticky dot.
I have loved putting this tutorial together and have loved using a new medium.
These will look great on our Christmas table.
Please don’t forget to tag me on instagram so I can see your masterpieces @crafty_vickie
…..my next blog will be some home décor….again using a new medium!
– Vickie McHugh –