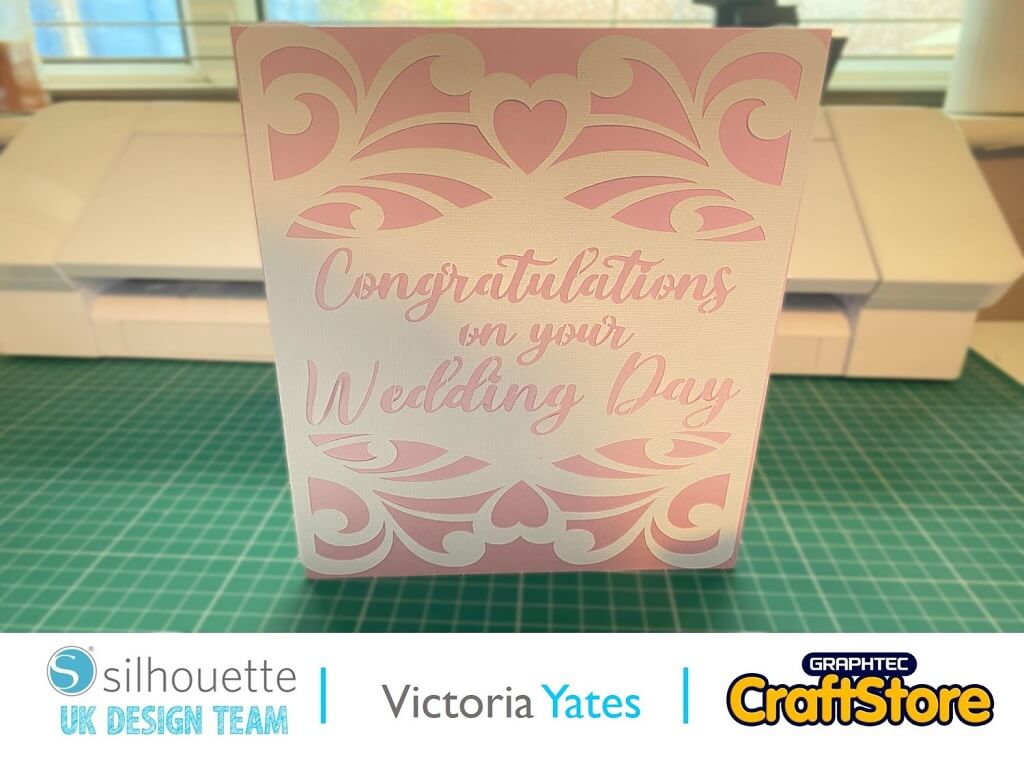
Wedding Sentiment Card
Hello again, Vicky here from Vee Creative.
Today’s post is Wedding themed, I’ve chosen a card blank from the Silhouette Design Store and added my own sentiment to the front.
Keep reading to see how this was done and how you can make your own greetings card with your own personalized greeting.
Firstly, I opened the file I purchased from the Silhouette design store.
It comes in 2 sections, one is the ‘card blank’ and the other is the decorative flourish which sticks to the front of the card blank.
I already had a card blank I wanted to use so I deleted the ‘Card Blank’ and kept the flourish front.
I then typed out my greeting and positioned it on the front of the design.
As the font I used is quite a thin font I applied an offset of 0.01.
I selected both the Card and the text and made a compound path.
To make it a little bit easier when adding the flourish section to the card blank once cut.
I drew some small rectangles (as shown) with the rectangle tool, I then placed these against the sections that weren’t attached.
You may notice I missed a few – That’s OK and it was corrected in the next steps.
To get the rectangles to attach to the rest of the design, I selected the whole design (including the rectangles) right clicked with my mouse and selected ‘weld’ from the options.
The design is now ready cut.
Th settings I used were:
Material: Adhesive backed Cardstock
Force: 29
Speed: 3
Passes: 2
Next up, I weeded the excess parts we won’t be needing, leaving the negative space.
I then added this to the my card blank and then added the parts of the card I forgot to add the rectangles too …..oops!
Here is the finished card. This was fun to create, however I will pay closer attention if I am making a sketch effect with the rectangles next time.
Of course, you can decide to skip that step if you decide to give it a go yourself. You could even make a personalised card for the happy couple.
Until next time, thanks for reading and Happy Crafting!
– Victoria Yates xx –


