How To: Using The Silhouette Punch Tool
How To: Using The Silhouette Punch ToolThe Punch Tool is now available in the UK and has been specifically designed for use with all versions of the Silhouette Cameo 4…
PLEASE NOTE THAT THE OFFICE WILL BE CLOSED FROM 12PM FRIDAY 20TH DECEMBER 2024 AND WILL RE-OPEN ON THURSDAY 2ND JANUARY 2025
ORDERS FOR DELIVERY PRIOR TO CHRISTMAS WILL NEED TO BE SUBMITTED BY 2.30PM ON THURSDAY 19THDECEMBER 2024.
ORDERS RECEIVED AFTER THIS TIME AND DATE WILL BE DESPATCHED ON THURSDAY 2ND JANUARY 2025.
Merry Christmas & A Happy New Year to all our customers. Thank you for your continued support.

Hi, Denise here.
Oh my goodness the weather has certainly changed it’s got colder.
Now for the nights to be settled in sitting in your Pyjamas with a fleece blanket and hot chocolate. Doesn’t that sound lovely.
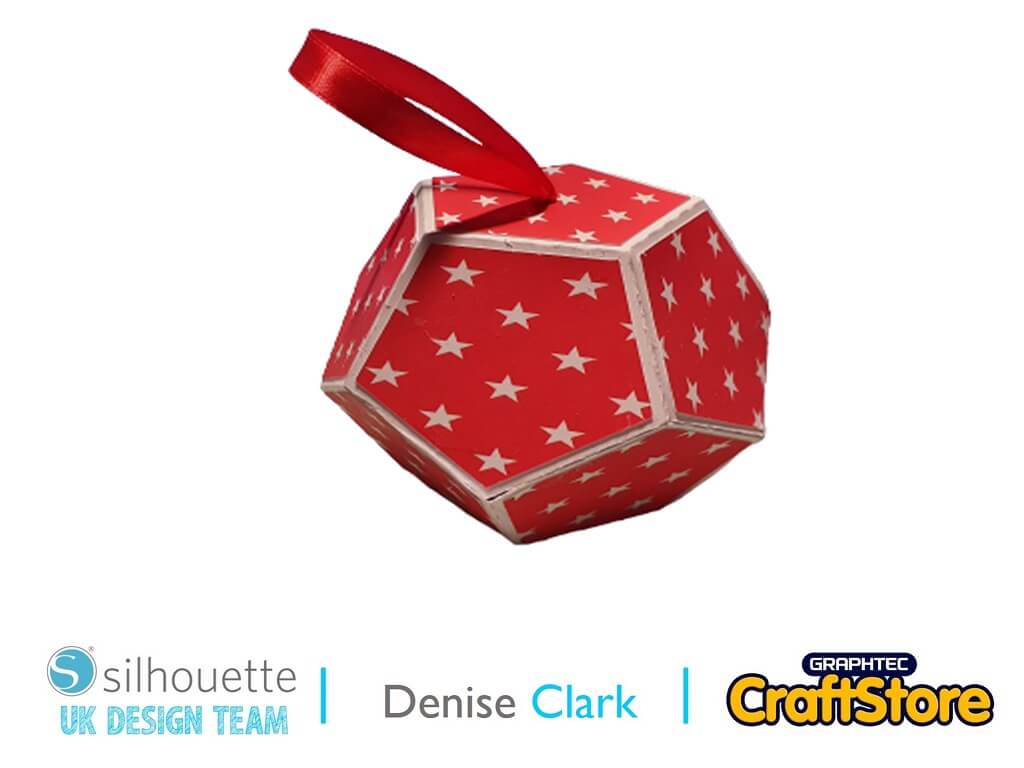
Now back to this weeks Blog, and its a Christmas Decoration so lets get started
Materials Used
• A4 Car
•Wet glue
•Ribbon

Open up your silhouette software and go to right hand corner and click on Library.
Look for your project and click on it to bring it into your design space.
You will need to ungroup which if you right click on your file on design space a drop down menu will pop up and scroll down till you see ungroup and click on it then anywhere on design space left click and it will separate your file.
I printed of a pattern which is in my library in the patterns which I found on left hand side in the library down the bottom and looked for the pattern I wanted to use.
Click on it to bring it into my design space and on top left hand corner click on the printer symbol, and it will come up click on print and it will take you to the printing dialogue and once you got your setting in print away
If your using the printed pattern from the library make sure you put that on your cutting mat and go to right hand corner and click on send.
Look for your media that you’re using and click on it you don’t need to do anything else apart if you’re using the Rachet blade for cameo 4 you will have too manually change the blade setting on your rachet blade.
Cut all parts out.


Now your project is all cut.
Now it’s time to assemble it all, before I fold along perforated lines, I added the pattern card and adhere it to the base of the decoration by using wet glue this gave you time if you must re position it.
Once all top part adhered onto it now fold every perforated lines and stick all sides together
Before I adhere both parts together, I added ribbon to the top part it shows you in the photo I put wet glue on ends of ribbon and adhere it to the inside of top part of project.
Now adhere both parts together and once you’ve done all that your project is ready to be hung on the Christmas tree!


– Denise Clark –

• Design Used: White on red star pattern
Design Store Artist: Renee Jablow
Design Store ID:208478> Download
• Design Used: Christmas Ball
Design Store Artist: Daniela Moscone
Design Store ID:279735> Download