Best DIY Dad | Cherylann McCool | Silhouette UK Blog
Best DIY Dad | For Father’s Day
Hi it’s me Cheryl again, time has passed so quickly the schools are about to stop, summer holidays have begun. W have one special thing in between these and it’s all about our dads.
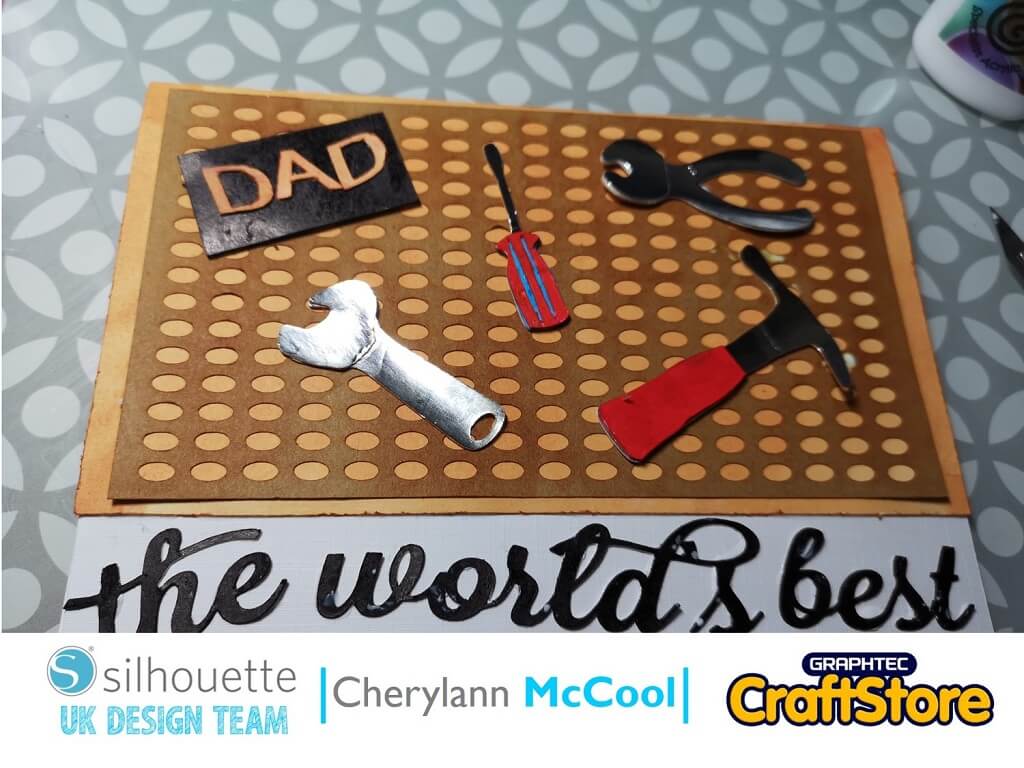
Father’s day is on 16th June this year and there is no better way to tell your dad how much you love him with a handmade card. This project is using adhesive back Kraft paper that can be used in your cameo’s.
Craft Materials Used
Silhouette Printable Adhesive Kraft Paper
White, Mirror and Kraft card
DST and or wet glue
Inks & Paints
Open Your File In Silhouette Studio
In your software open your file in the design space and open show design space settings under the view tab.
Make sure you have A4 set as page size and select your appropriate mat.
Resize Your Card
It’s at this stage that you can resize your card to a more suitable size if that works better for you.
Send Your Card To Cut
Once your card has been resized then it’s ready to be cut. Now, send to cut and make sure your settings are suitable, you can see my settings in the picture for guidance.
Remember, Silhouette Kraft Sticker Paper Is In Letter Size
Although working on an A4 size for cutting your card for the Kraft Sticker Paper, take a note of the sizes. You need to change A4 to Letter size and then load your Kraft Paper onto the mat, then in the send tab adjust your settings before sending to cut.
Removing The Silhouette Kraft Paper
Once your Kraft paper has finished cutting out, you can use a palette knife or the official Silhouette Universal Spatula to carefully lift the Kraft Paper including it’s adhesive backing away from the carrier sheet.
Once removed you should be left with this.
(Make Sure You Scroll To The Right For Both Images)
Cut Out The Remaining Card Parts
For the main tool parts I cut these using Mirror Card but for the handles you can cut in white or coloured card.
You can also cut the words dad and tile here and do the same as per steps above.
For sending to Cut remember to change your size back to A4.
(Make Sure You Scroll To The Right For Both Images)
The World's Best
As per the same as above cut the text out in card of your choice ensuring you change size back to A4.
Now for the really fun part, it’s time to put your card together.
Colour Your Pieces
Now you can colour your handles to maybe suit dads tool colours then glue the handles on to the main part.
You will also do this with the Dad words then you can use Tim Holtz Distress Ink Rusty Hinge to try and rust the tools to give them a more authentic look.
You can also do this with the Kraft paper for the Peg board.
(Make Sure You Scroll To The Right For Both Images)
Enter Short Heading Here
With you’re the world’s Best and the tile for the Dad words cut out I used Cosmic Shimmer Graphite Gilding Polish to paint these with to give a shine.
Pulling It All Together
Now with you main card base in front of you it’s time to decide what way you want your card to be.
1: Place the frame onto the card first
2: Next, place the peg board on top
3: Finally, fit the tools onto the board along with the Dad tile and the title goes along the bottom.
(Make Sure You Scroll To The Right For Both Images)
Voila! Your DIY DAD Card Is Complete
I really enjoyed doing this project!
There is nothing better than showing your Dad how much you love him with a special card that your kids can even enjoy making with you.
I found this card to be fun to make and is easy to an extent but kids would need help in making it as it might be a little tricky for younger hands. I feel this card could be used for any male themed cards where required, but I also think it could be adapted for different projects including mixed media.
Well that’s Father’s Day gone for another year so I hope you can join me for my next project and ladies if you like a Pina colada then you will love my next project.
– Cherylann McCool –
Silhouette UK Blog Created By Cherylann McCool
Silhouette Products Used
Silhouette Designs Used
• Download Design: Click Here
