Advent Calendar | Cherylann McCool | Silhouette UK Blog
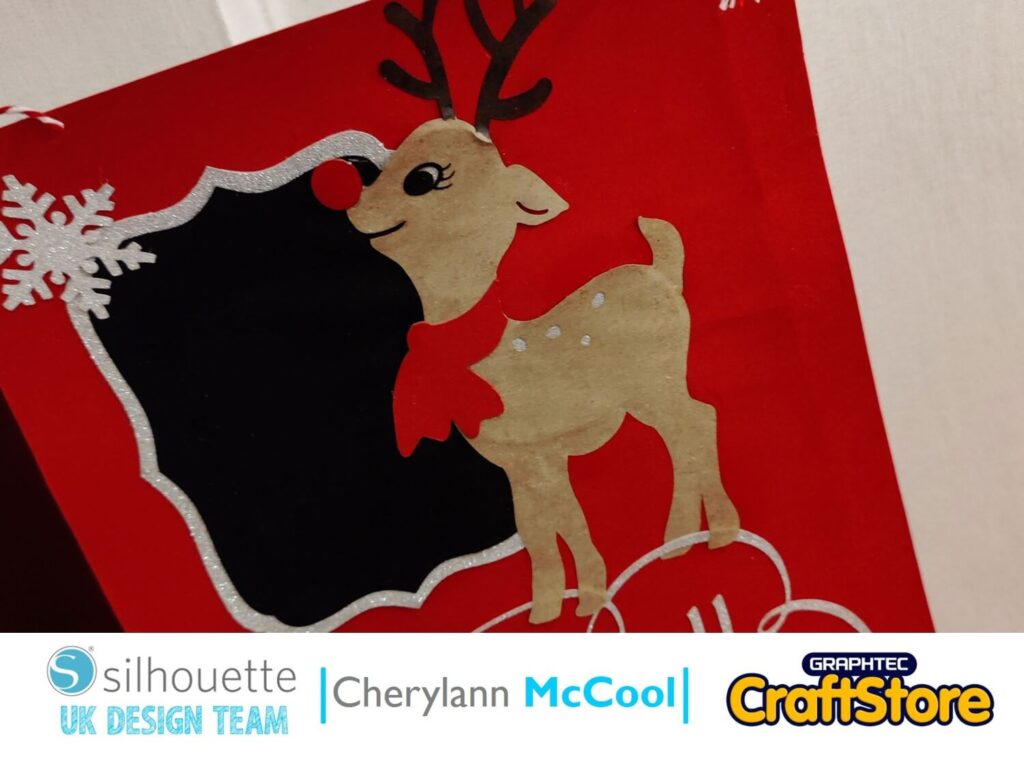
Advent Calendar | Cherylann McCool | Silhouette UK BlogRudolph’s Countdown Hi it’s Cheryl here again. It only feels like yesterday since my last blog and here we are again. With…
PLEASE NOTE THAT THE OFFICE WILL BE CLOSED FROM 12PM FRIDAY 20TH DECEMBER 2024 AND WILL RE-OPEN ON THURSDAY 2ND JANUARY 2025
ORDERS FOR DELIVERY PRIOR TO CHRISTMAS WILL NEED TO BE SUBMITTED BY 2.30PM ON THURSDAY 19THDECEMBER 2024.
ORDERS RECEIVED AFTER THIS TIME AND DATE WILL BE DESPATCHED ON THURSDAY 2ND JANUARY 2025.
Merry Christmas & A Happy New Year to all our customers. Thank you for your continued support.
Hi it’s me Cheryl here again.
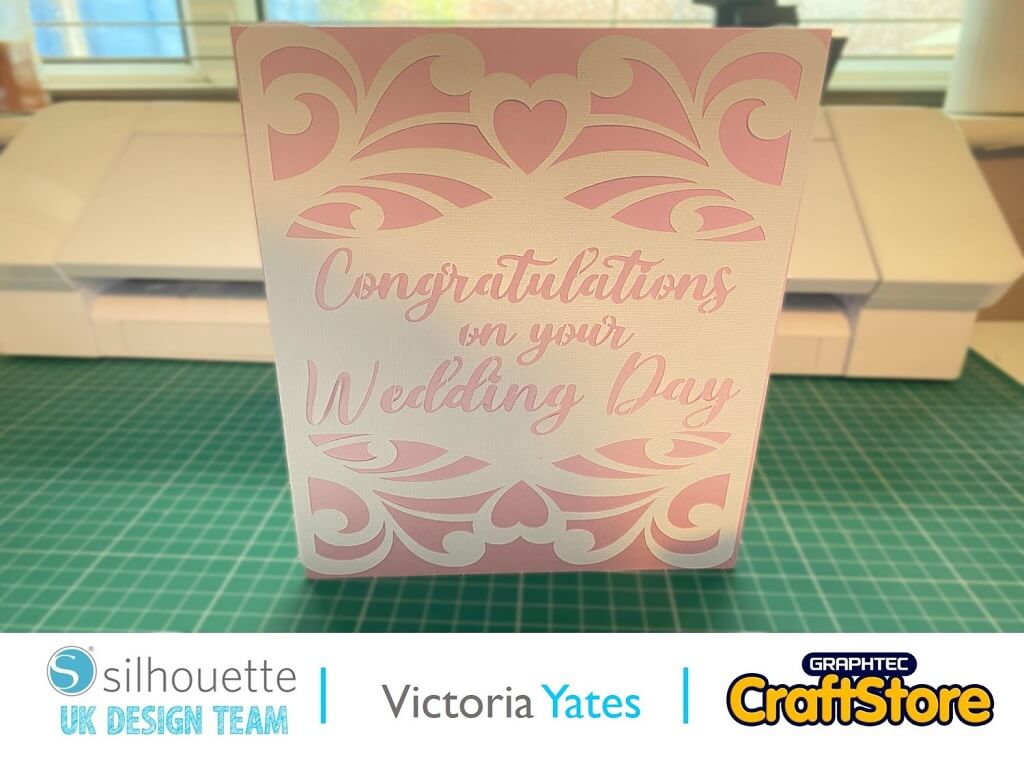
That’s lockdown eased here in Scotland and I’m hoping to get out in our caravan but before that I’ve got plenty of crafting to do and the weather is nicer and people may want a simplistic wedding .
Well take a look at this week’s project and it’s perfect, so let’s go and start crafting.
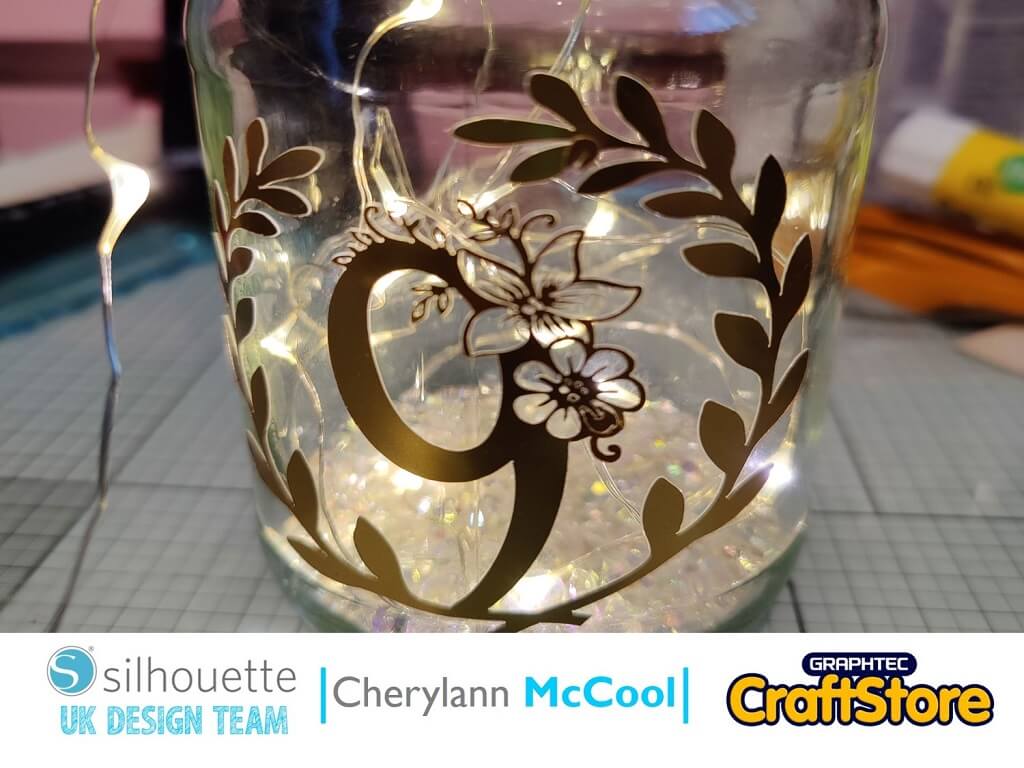
• Silhouette Printable Sticker Foil
• Glass Jar
• Adhesive Gems
• Jute or Ribbon
• Battery Operated Lights
• Glue


In your software open your file in the design space and you will see that your file opens and now you have to decide on the size of mat you will need to use.
I recommend using the A4 mat size.
So now you want to decrease the size of your image.
You want to click on the edge of your image until you see the black box going around and then if you go to one of the bottom right hand white box and if you grab and drag the box until you get the size you need.


If you are planning on making a few of these then select the black box around your file you need to right click and duplicate.
Next, drag the next across to the other side or you can also go to Object then replicate and chose the correct option.
Once you have done this you now want to click send.
Here you will see your screen change.
Now you want to change your material to foil printable, then you will see the settings change to suit your material if happy then press send to cut.


Now the fun bit, putting it all together.
Carefully cut round each of your design and then carefully peel the sticker of the backing and place on to the center of your jar.
Do the same for your remainder ones, now glue gems onto the lid.
Now put your gems into the bottom of the jar and then place your lights into the jar.
Wrap some jute strings around the top of your jar and place on the center of the tables with the lights lit.
Once you’re happy hit the send button.
On this screen you can change your material here and you want to pick adhesive cardstock, once selected, hit send.
Once all your pieces have been cut and you have weeded them from the mat the really fun bit of putting it all together starts.


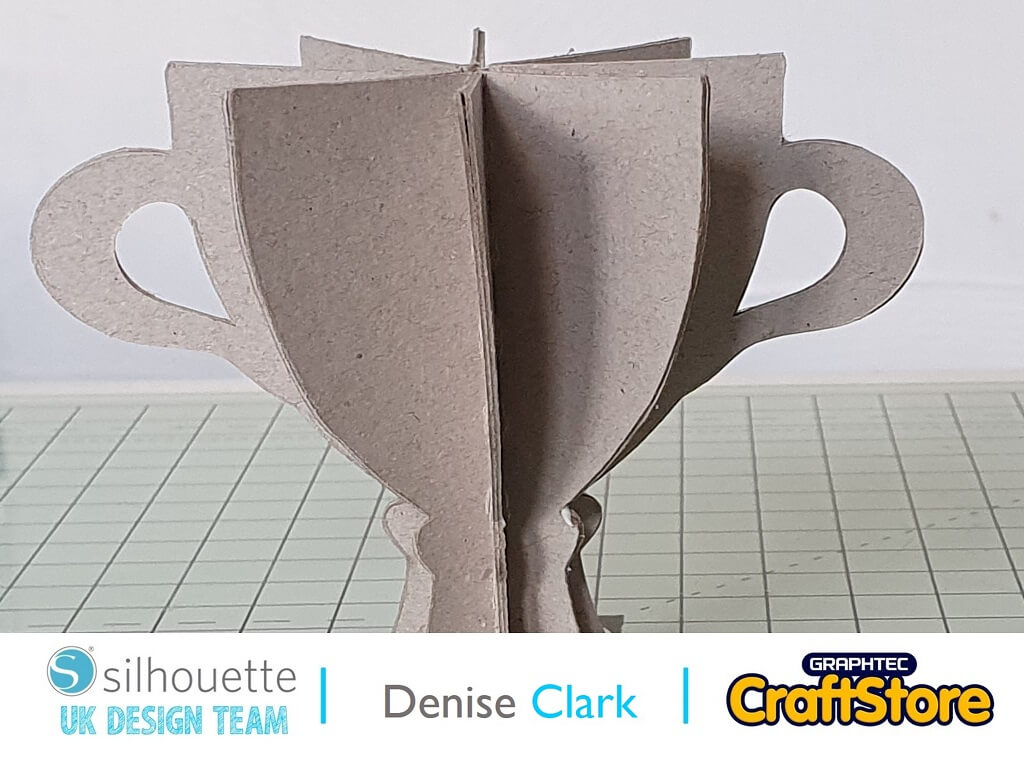
Once again I have loved making this file and feel it’s perfect for weddings whether you are having a posh or simple wedding.
This is relatively quick to make so it’s ideal if you are going to make them as wedding table centerpieces.
I do hope you try this design as it looks great when finished and can be done to any colour theme and can be decorated to suit your wedding or even Christmas dinner table.
Well, I hope you will come and join me on my next project where we will be going on holiday so you will just need to come and see what is happening.
Have a great week!
Bye for now!
– Cherylann McCool xx –
• Design Used: Floral Number 9
Design Store Artist: Sophie Gallo
Design ID: 287161 > Download