Valentine’s Day Card | Victoria Yates | Silhouette UK Blog
Valentine’s Day Card
Hello crafters!!
Vicky here from Cut That Design!
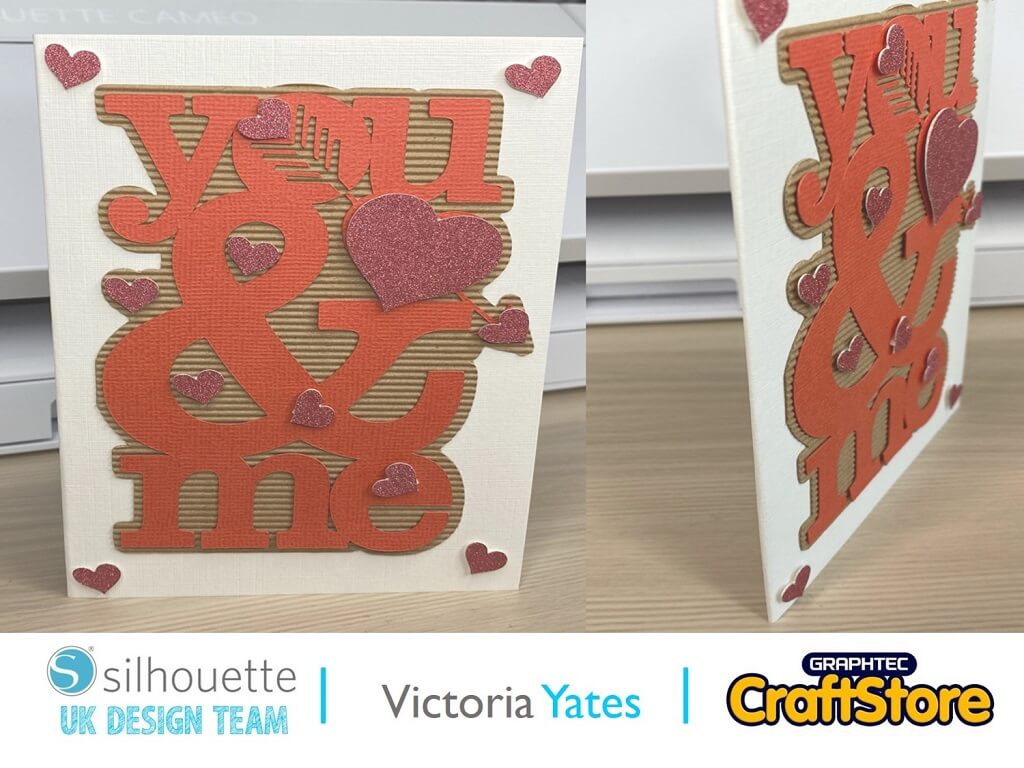
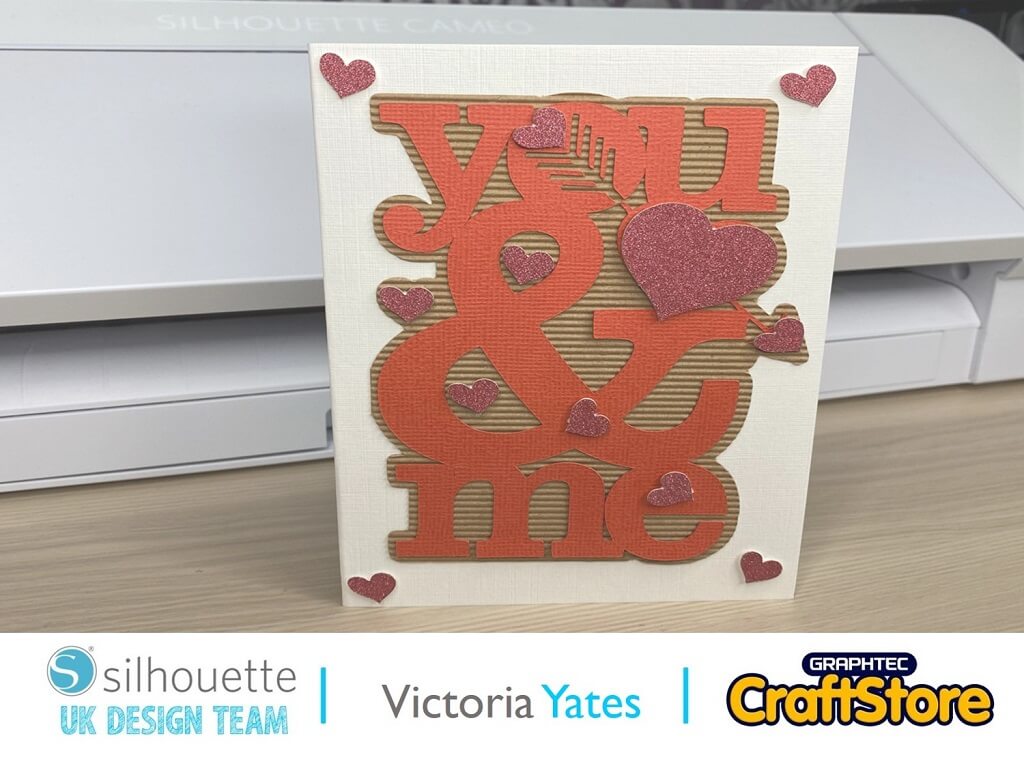
For today’s blog I will show you how to make this Valentine’s Day themed card.
I’m excited to show you this, due to the fact it’s the first time I’ve ever cut with corrugated card, and I feel it really adds to the design.
Before I get started, here are the materials I used to create my Valentine’s Day Card.
Items you will need:
• Silhouette Self-Adhesive Cardstock
• Silhouette Adhesive Corrugated Paper
• Glitter Card
• Adhesive Foam Pads
Choose Your Design
My first port of call, as always, is to peruse the Silhouette Design Store in search of the ‘perfect’ design for my project.
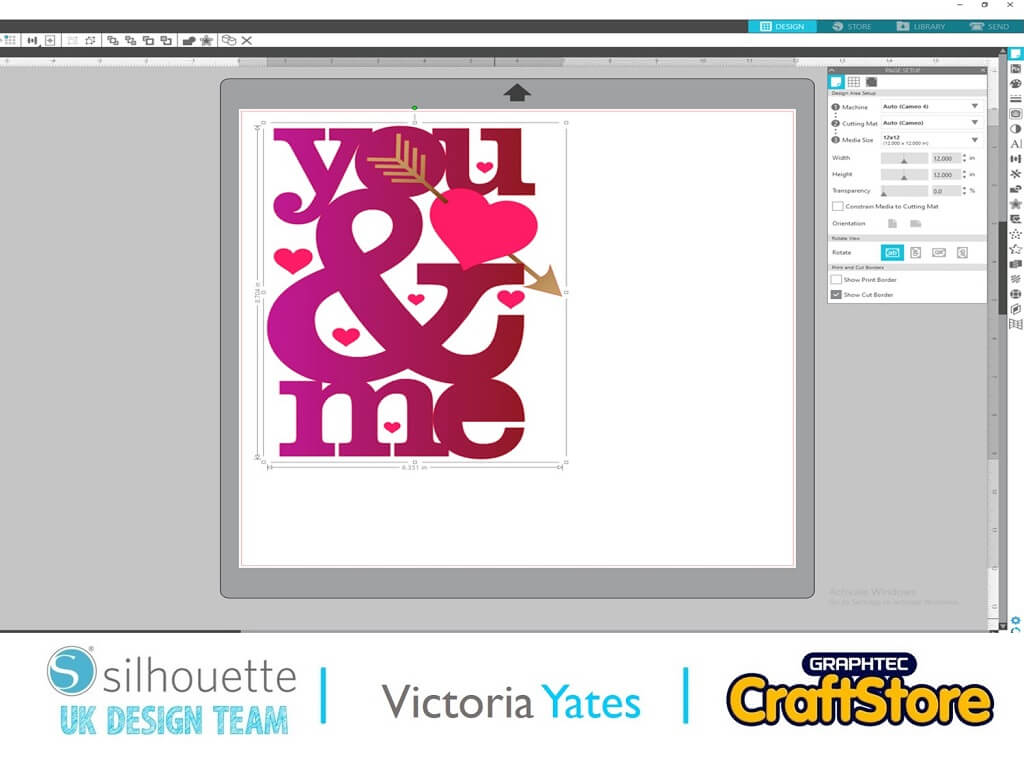
I came across this You and Me Design by SAS
Creative, and I knew instantly that I wanted to use this in my project.
Once I had purchased and downloaded, I opened the design in Silhouette Studio, and adjusted my page settings accordingly.
Preparing The Design To Cut
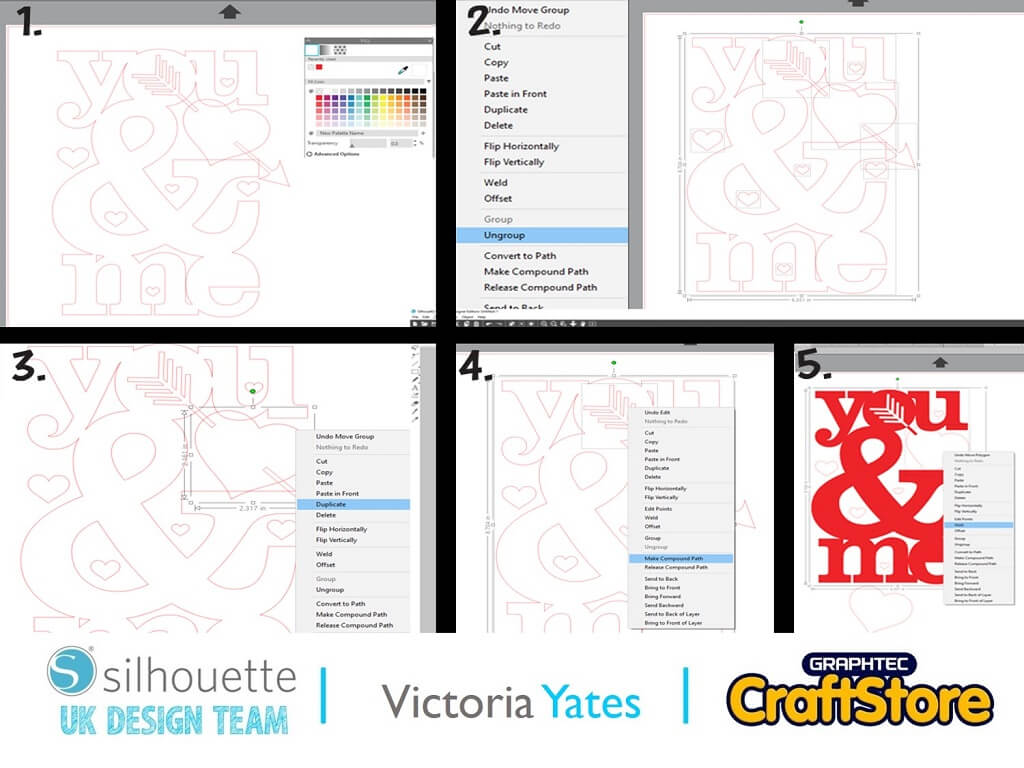
I made a few small adjustments to make this design work for my project.
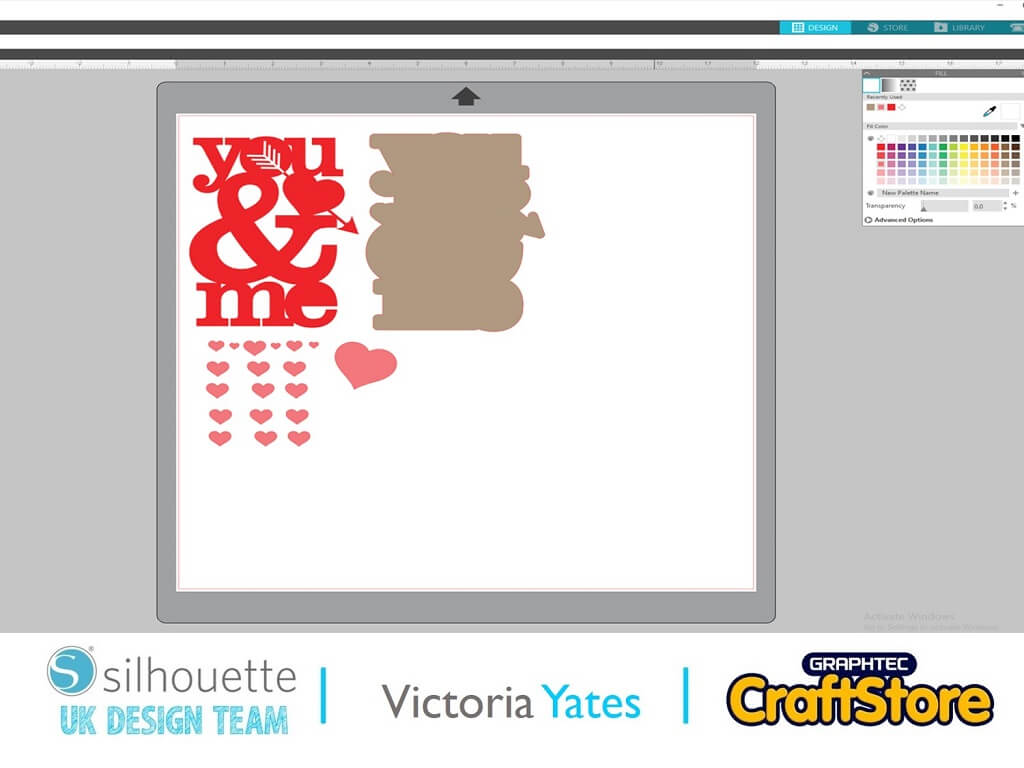
1. Firstly I changed the fill colour to no fill so I could see the cut lines.
2. I ungrouped the design by selecting the design and right clicking ungroup.
3. I then made a duplicate of the large heart (right click, duplicate) and put it to one side on the canvas, the duplicated heart will be cut with glitter card stock!
4. For this next section, I selected both the end of the arrow which is in the ‘O’ of YOU.
I then selected the YOU and ME sign minus the heart, I then made a compound path. (Right click, compound path)
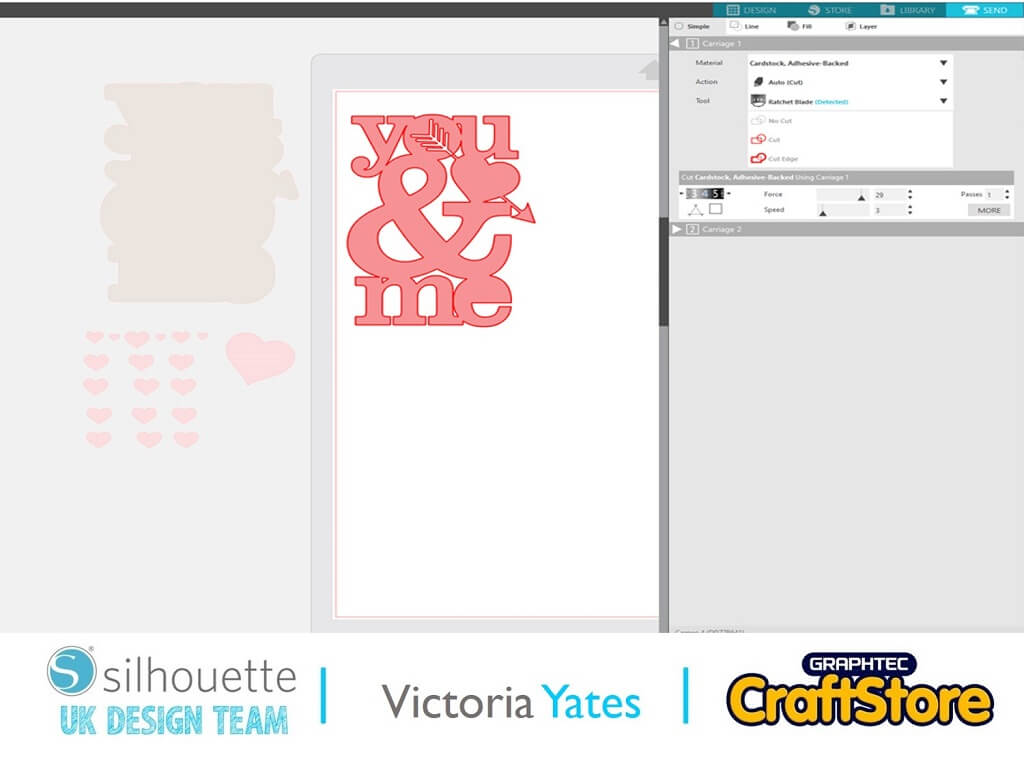
5. In section 5 I filled the design so you can see that the end of the arrow is now part of the Letter O rather than being separate.
Next, I welded the large Heart and the front of the arrow to the You and Me design.
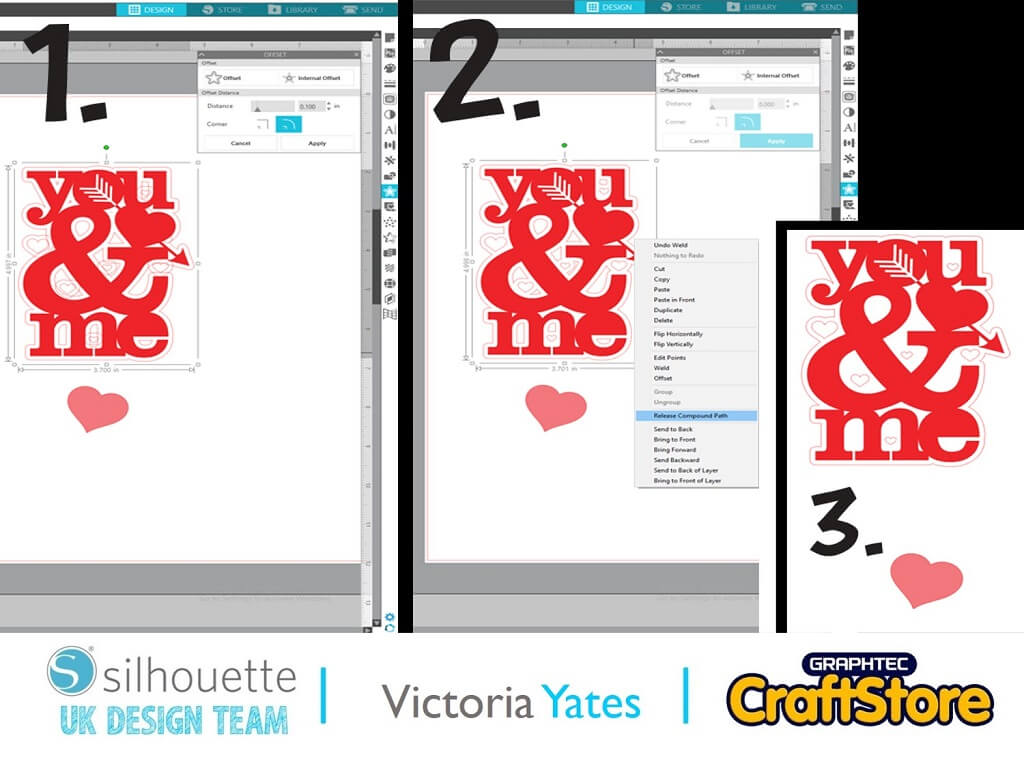
Applying The Offset
1. In this section you can see what the design will look like once welded.
To create the corrugated paper backing I created an offset of 0.10 and clicked apply.
2. For this step I deleted the inner shapes created by the offset, so I’ll be left with what is shown in image 3.
Arranging By Colour
Everything is ready to cut, I arranged the layers by colour for my own reference, I then duplicated a few of the smaller hearts to add something a little extra to the card.
Cut Settings
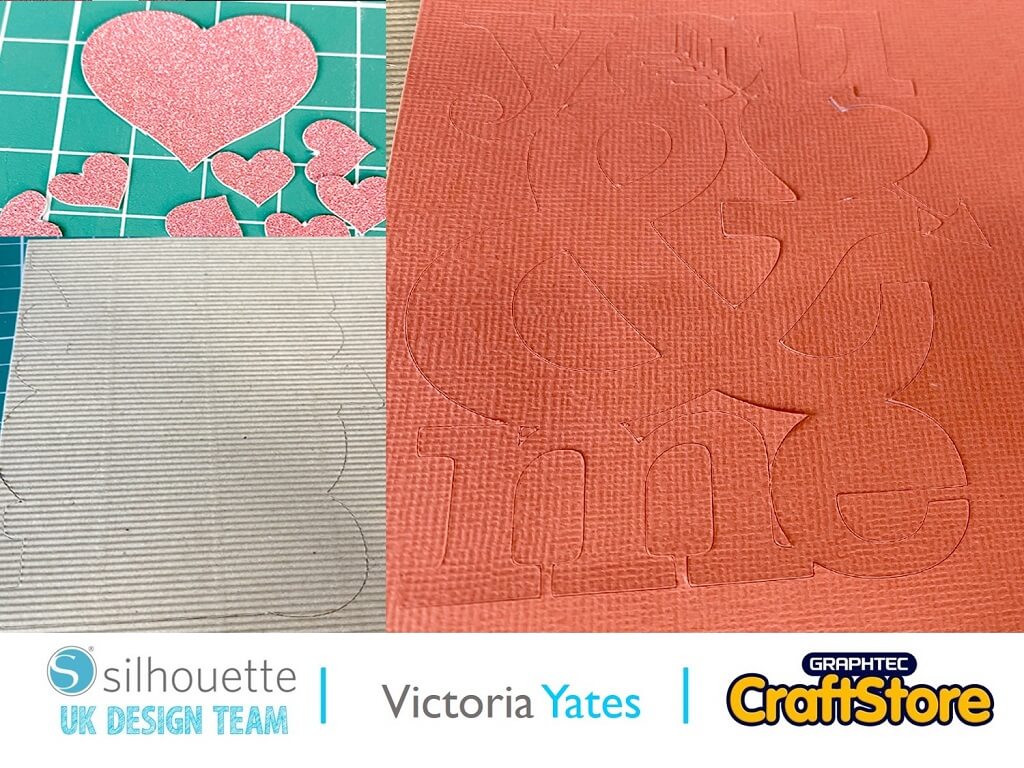
I then loaded my Silhouette, and cut my card as per the default settings, as my blade is new, and the Corrugated paper and Cardstock are Silhouette branded I only did a test cut on the Glitter card which isn’t a Silhouette brand.
The cut settings used were as follows:
Corrugated Paper:
Blade = 8
Force = 33
Speed = 3
Self Adhesive Card Stock:
Blade = 4
Force = 29
Speed = 4
Glitter Card:
Blade = 6
Force = 33
Speed = 3
Please Note: If you are using the Premium blade like me, you will have to change the blade each time!
Arranging Cut Outs
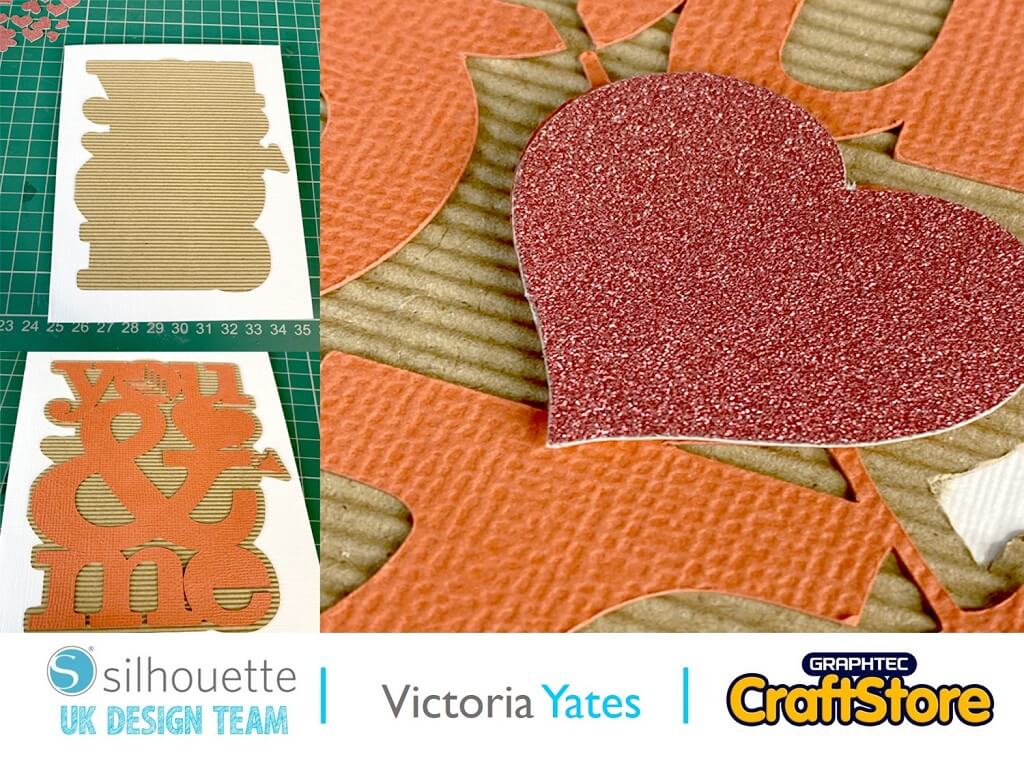
I left the ‘You and Me’ and Corrugated Paper, cut outs on the backing, as the Glitter card isn’t adhesive backed, I removed these from the mat and added some Adhesive foam pads to the back of them.
Putting Everything Together
I then added all elements as shown, and the smaller hearts I placed randomly on the card.
Here is the completed design, I had originally made one where I added actual glitter, but it got a little messy and was not what I envisioned in the end.
So remembering I had some Glitter card (non-shed) lying around my craft stash, I re-visited the project, and this is the result which I am very happy with.
One thing I would change is the card blank, with the corrugated card I think an Ivory or Cream blank would work better.
I think if you can take away one thing from this post, is if it doesn’t work the first time, don’t give up, try something different and see how it goes!
Thank you for reading and Happy Crafting!
– Victoria Yates xx –
Silhouette UK Blog Created By Victoria Yates
Silhouette Products Used
Silhouette Designs Used
• Design Used: Valentines You & Me Love Heart
Design Store Artist: SAS Creative
Design Store ID: 287347 > Download
