Christmas Treat Boxes | Sharon Nettleship | Silhouette UK Blog
Christmas Treat Boxes | Sharon Nettleship | Silhouette UK BlogChristmas Treat Boxes Hi DT Sharon here. Using your Silhouette Cameo is a great way of making some of those little…
PLEASE NOTE THAT THE OFFICE WILL BE CLOSED FROM 12PM FRIDAY 20TH DECEMBER 2024 AND WILL RE-OPEN ON THURSDAY 2ND JANUARY 2025
ORDERS FOR DELIVERY PRIOR TO CHRISTMAS WILL NEED TO BE SUBMITTED BY 2.30PM ON THURSDAY 19THDECEMBER 2024.
ORDERS RECEIVED AFTER THIS TIME AND DATE WILL BE DESPATCHED ON THURSDAY 2ND JANUARY 2025.
Merry Christmas & A Happy New Year to all our customers. Thank you for your continued support.

Hello and welcome to my new blog.
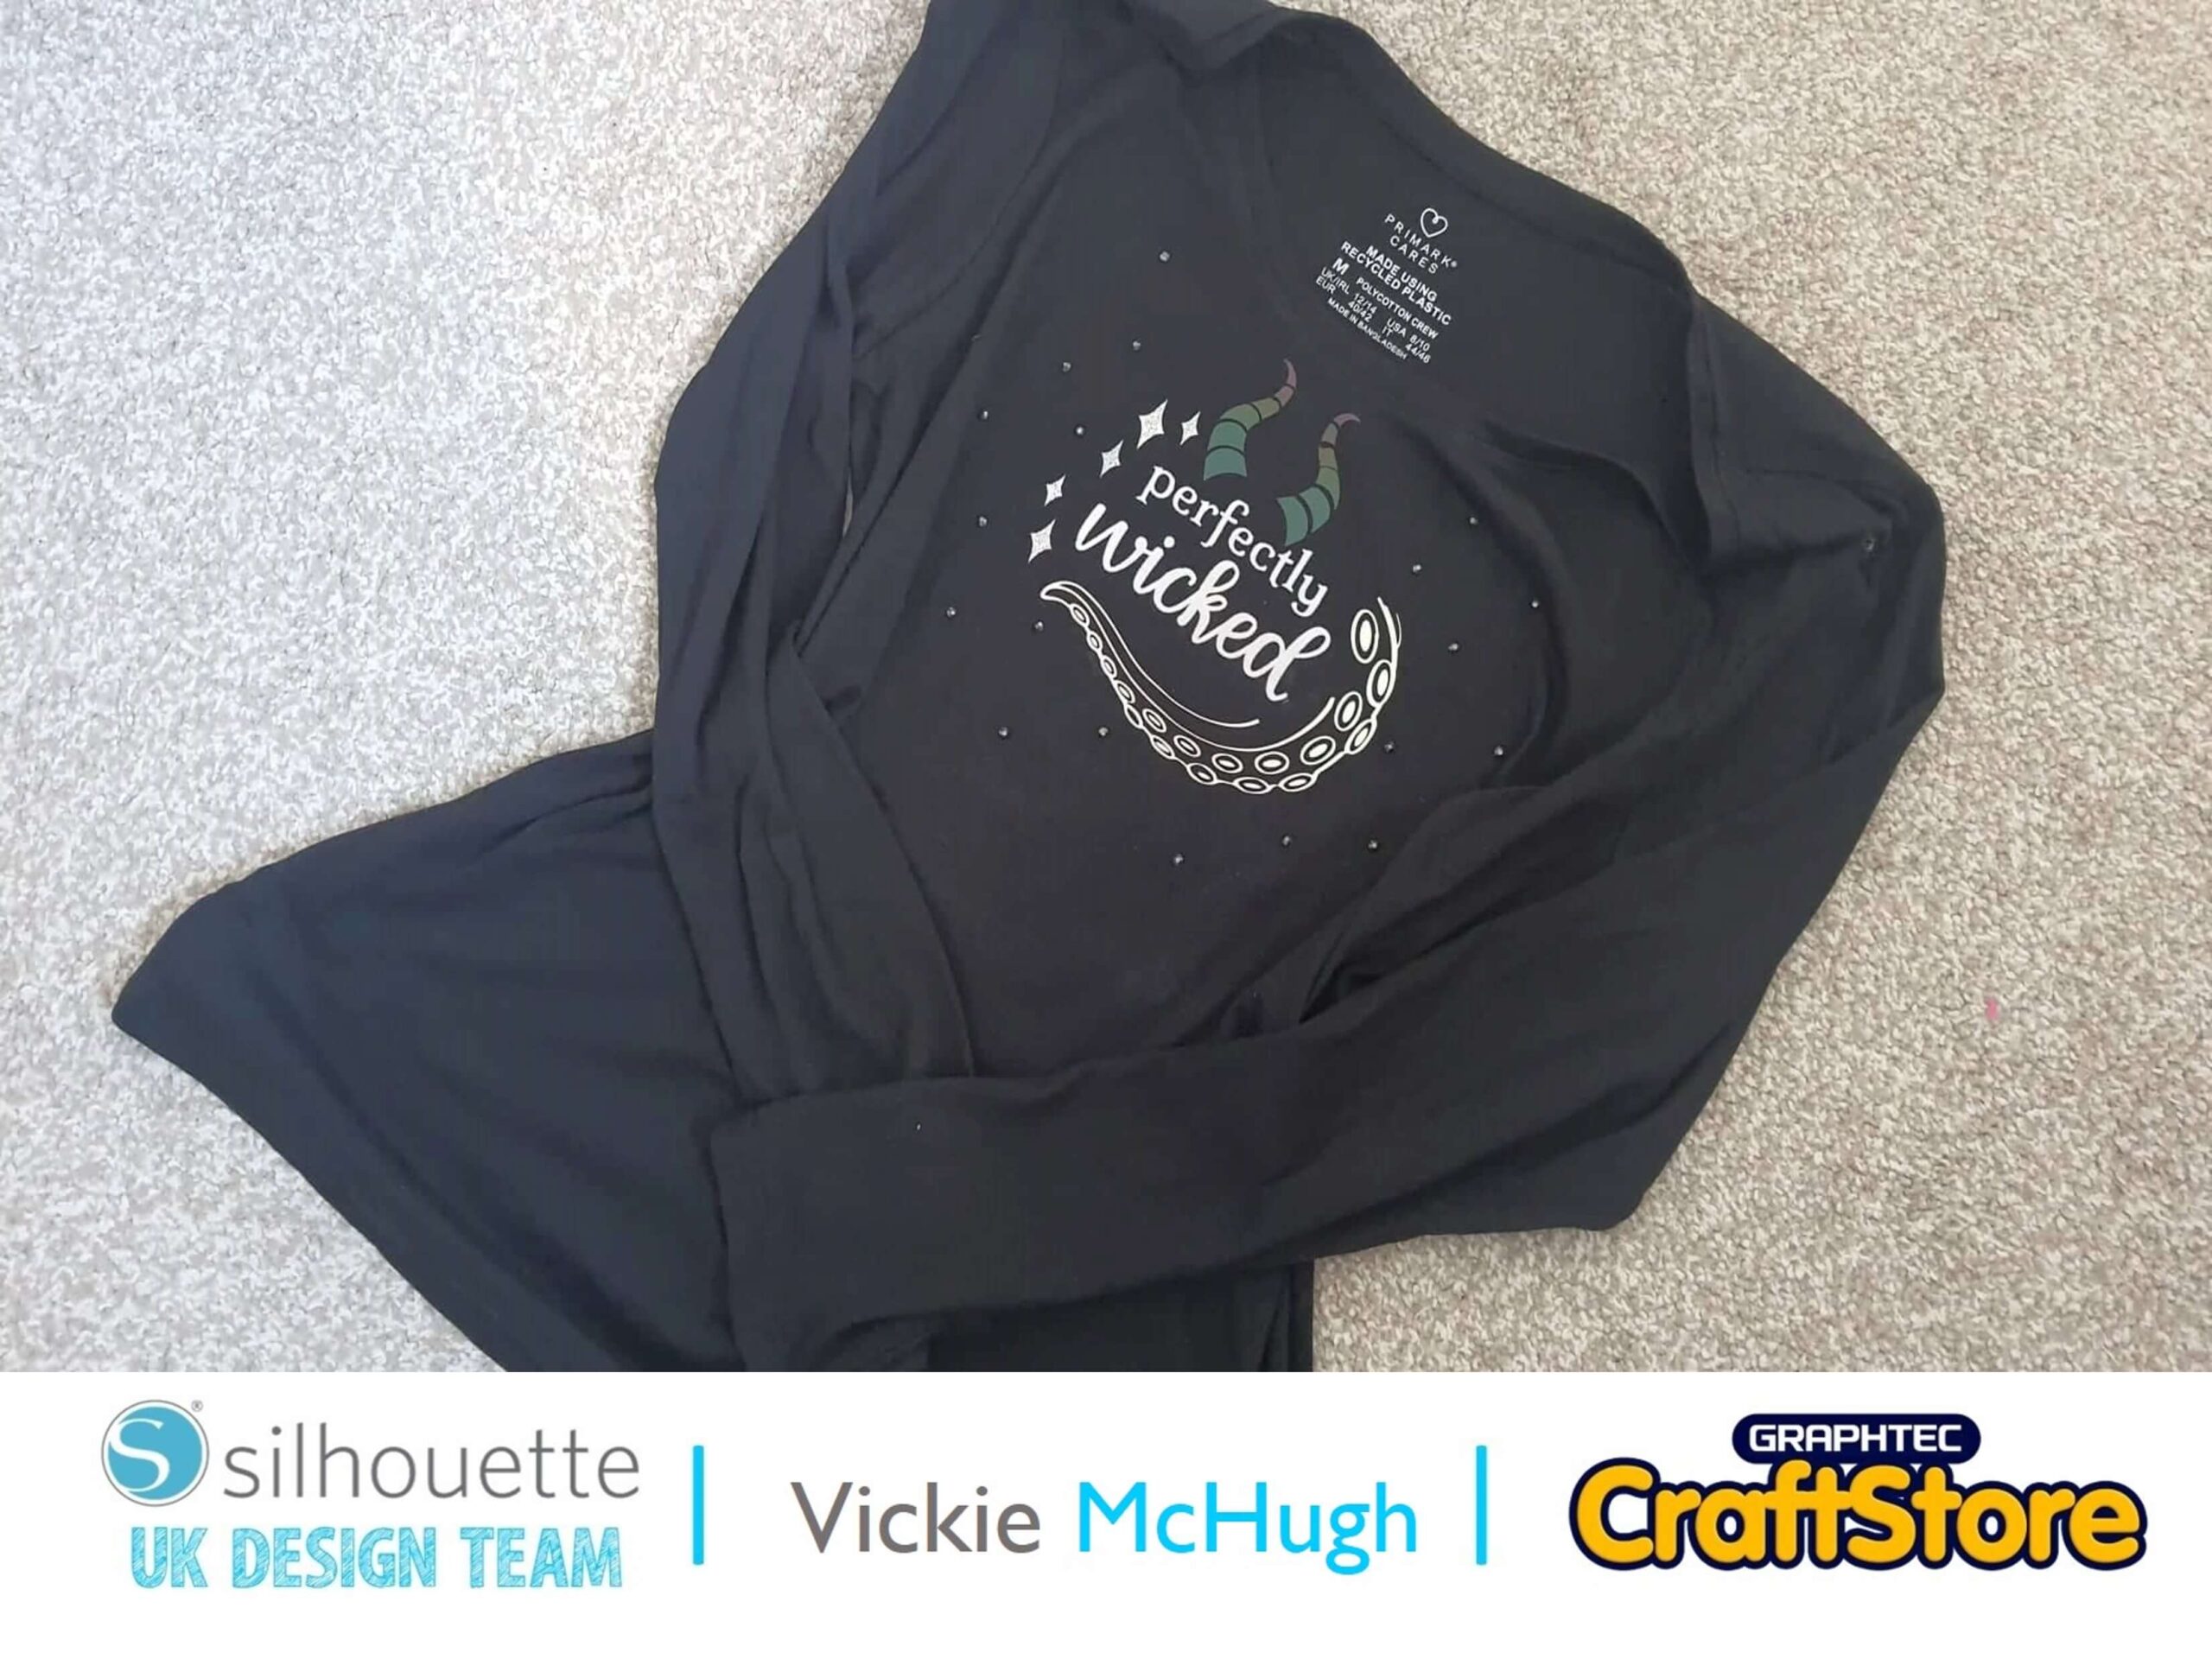
This week I am going to show you how to make a spooky t shirt, ready to wear for Halloween.
This is a great way to personalize your own clothes, bags and other fabric items.
Items I Used
• Silhouette Curio Machine
• Silhouette Standard Ratchet Blade
• Silhouette Heat Transfer Vinyl
• Glow-In-The-Dark Heat Transfer Vinyl
• Heat Press/Iron

Having looked in the Silhouette design store, there were so many cute Halloween designs that I struggled to choose which one to use on the t shirt.
In the end, I did purchase a couple, but decided on “perfectly wicked”.
I then pull it into Silhouette studio from my library by double clicking on the file.
I then place my t shirt out on a flat surface and using a ruler, map out how big I want my design to be.
I am going to make it approximately 6” across.
So making sure that the padlock is closed, I have changed the width to 6”.


As I am using 4 different types of HTV, I am going to separate my design to cut out different sections in the different HTV.
To do this right click and ungroup the file.
Move out each section of the design onto a different part of the mat.
Looking at how you have set up the mat, place the vinyl to match the layout.
Don’t forget that it will be mirrored when cutting, so reverse the vinyl.
Please remember – place the HTV matte side facing up.


Once you are happy with the vinyl and placement, click on the SEND in silhouette studio.
Please remember that different types of HTV has different settings within Silhouette Studio.
I am cutting out the writing first which is Flocked HTV:
Cut settings:
Material: Heat transfer, Flocked
Blade: 3
Force: 33
Speed: 5
Passes: 1
Make sure you only have the section you want to cut highlighted in red, to change the others, click on them and select No Cut.
Click SEND
It will then ask if you would like it mirrored – ALWAYS SELECT YES
Follow this process for all sections remembering to change your Material in Silhouette Studio.
Once they have all been cut weed the design.
Place the t shirt onto a ironing board and layout your design ready to heat it.
As it is not one whole piece, I have heated it onto the t shirt in sections so I can make sure that each type of HTV has stuck down.
Then when you have completed the HTV, place out some hot fix gems and using the iron and a steady hand, fix them onto the t shirt as well.


I have really enjoyed putting this together for my little princess.
The magnet paper is so versatile, the possibilities are endless!!
I look forward to seeing what you make.
Please don’t forget to tag me on Instagram so that I can see your masterpieces @crafty_vickie
– Vickie McHugh –