Valentines Day Mug | Graphtec GB Craft Store
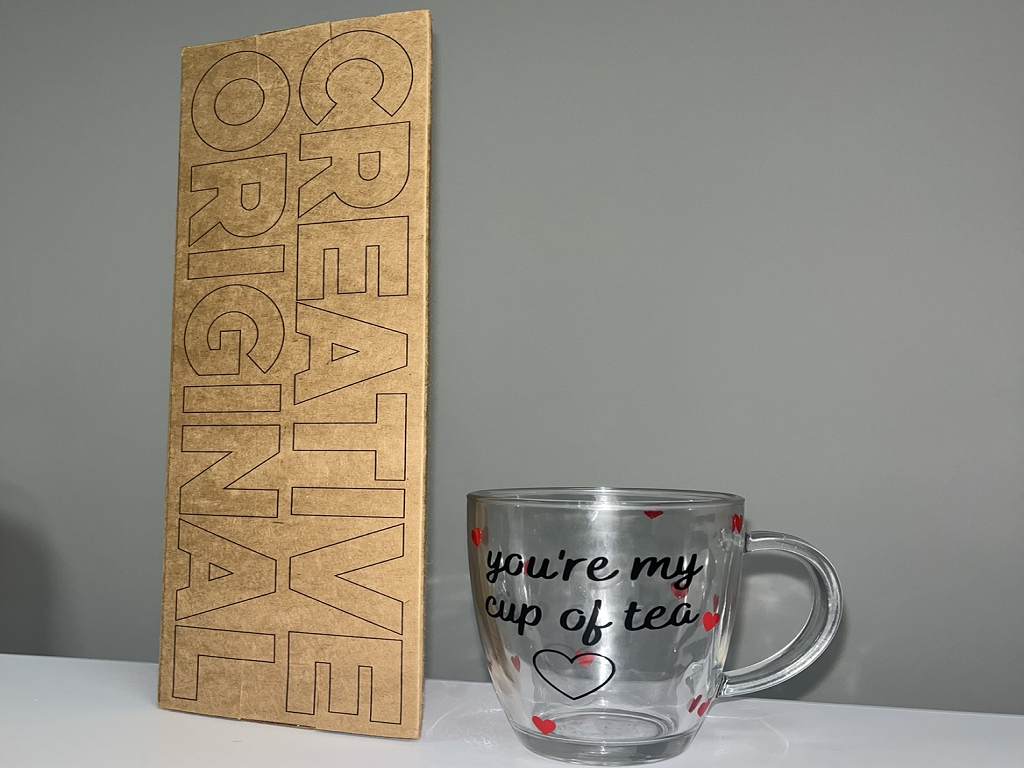
Valentines Day Mug | Graphtec GB Craft StoreValentines Day Mug So for this blog, we will be making Valentines Day themed mugs. Items Used • Silhouette Portrait Machine • Colour&Shape…
PLEASE NOTE THAT THE OFFICE WILL BE CLOSED FROM 12PM FRIDAY 20TH DECEMBER 2024 AND WILL RE-OPEN ON THURSDAY 2ND JANUARY 2025
ORDERS FOR DELIVERY PRIOR TO CHRISTMAS WILL NEED TO BE SUBMITTED BY 2.30PM ON THURSDAY 19THDECEMBER 2024.
ORDERS RECEIVED AFTER THIS TIME AND DATE WILL BE DESPATCHED ON THURSDAY 2ND JANUARY 2025.
Merry Christmas & A Happy New Year to all our customers. Thank you for your continued support.
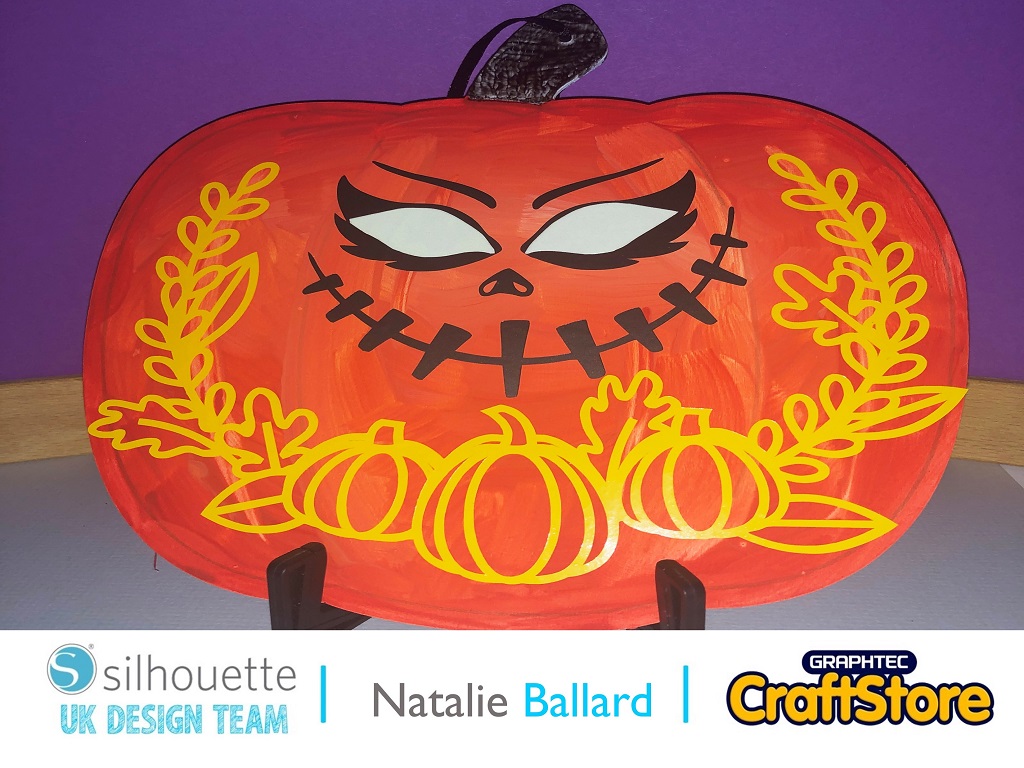

Hello! Natalie here today.
For this blog I wanted to show you how you can make your own Halloween decorations.
Before we move onto layered designs, let’s create a simple multi-colour design. You need lots of colours in your vinyl stash and the bulk pack is a great way to get started.

Begin by applying a thin layer of gesso to your pumpkin.
Your pumpkin could be 3D or flat, but flat is easier for beginners.
Then, apply dots of red yellow and pale cream and blend them all over your pumpkin.
Set this to one side to dry completely.
Purchase, download and import the autumn border and pumpkin face designs.
There are lots of faces to choose from on the Silhouette Design Store.


Use the line tool and Draw a Curve Shape create an eye shape.
The joy of the Draw a Curve option is that it works out the curve for you.
The closer the clicks the tighter the curve; with corners needing two clicks very close together.
Draw one eye and then duplicate and flip it horizontally.
Rather than using weeding boxes, we are going to trim our vinyl to fit our design elements.
Count the squares on screen and then trim your vinyl accordingly for each piece.
Lay these on the mat and align your design on screen accordingly.


Set your cut settings to vinyl glossy and put the blade up one notch.
This won’t be enough to cut through the glow in the dark material but that can be finished by hand.
Weed your vinyl pieces (which is where we remove the waste vinyl we don’t want to transfer to our project.
Lift the vinyl from the backing piece using transfer tape. Move to your project, align the piece (starting with the border) and burnish down onto the dry surface.
Repeat for each piece.
I really enjoyed creating this piece and I can’t wait to work with MDF and vinyl again soon.
This design concludes my Halloween projects for this blog… onwards to Christmas.
– Natalie Ballard –