Personalised Tote Bag | Victoria Yates | Silhouette UK Blog
Personalised Tote Bag | Victoria Yates | Silhouette UK BlogPersonalised Tote Bag Hello again!! Vicky here from Vee Creative Designs! I hope you’re all well and enjoying the nice weather,…
PLEASE NOTE THAT THE OFFICE WILL BE CLOSED FROM 12PM FRIDAY 20TH DECEMBER 2024 AND WILL RE-OPEN ON THURSDAY 2ND JANUARY 2025
ORDERS FOR DELIVERY PRIOR TO CHRISTMAS WILL NEED TO BE SUBMITTED BY 2.30PM ON THURSDAY 19THDECEMBER 2024.
ORDERS RECEIVED AFTER THIS TIME AND DATE WILL BE DESPATCHED ON THURSDAY 2ND JANUARY 2025.
Merry Christmas & A Happy New Year to all our customers. Thank you for your continued support.

Hello again!!
Vicky here from Cut That Design!
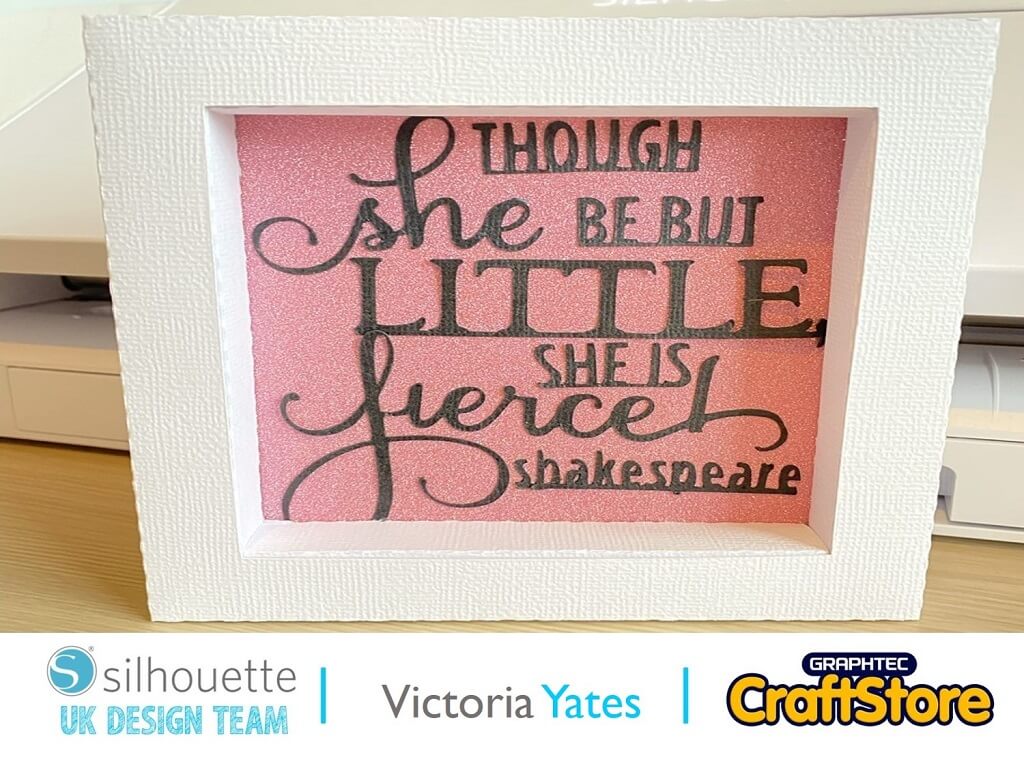
To celebrate National Shakespeare week, I have made a Cardstock frame with a popular Shakespeare quote!
The reason I chose cardstock was for one, I didn’t have a frame to hand, and two when I saw the cardstock frame in the Silhouette Design Store I felt inspired and thought I’d give it a go.
Extra products you may need is some glue, and some Glitter Cardstock.

As always, I popped over to the Silhouette Design Store and downloaded the Frame and quote!
I then resized the frame and the quote.
I made a slight error here, and as you can see from the completed frame the swirl ‘F’ in fierce is partially hiding behind the frame.
I should have sized the quote up to the middle square ‘white’ area in the main frame design.
Next up, to make my life a little bit easier, I added a small rectangle underneath the non-cursive font and welded them together.
This is so I wouldn’t have to place each letter individually.
Once this was done, I then cut them with my Silhouette Cameo 4, using the following settings:
For the Frame and quote I used Adhesive Cardstock with the following settings:
Machine Settings:
Force: 29.
Speed: 3 (for frame)
Speed: 2 for quote.
Pass 1: for frame
Pass 2: for quote.
Blade 4: for both
For the backing I used glitter cardstock from my own stash.
Machine Settings:
Force: 33
Speed: 3
Pass: 2
Blade: 6


Once cut I then weeded the quote design, it was a little tedious due to its intricate and small nature, great if you love weeding!
I had to make the Shakespeare name a little bigger as it wasn’t being very cooperative the first time, I cut it.
Next up I put the frame together.
In order for this to fit together properly, I folded over the sides with the flaps first (as shown), I then folded over the over sides.
I did make the mistake of putting the incorrect sides together first, I then couldn’t fit the other sides with the flaps down!


I added the glitter card backing to the white backing of the frame.
I cut the flaps off the white backing, as I wanted the glitter backing to stick to the adhesive side of the backing.
You will require glue if you want to add the backing as is.
I am pleased with how this project turned out, apart from me making the quote a little too big (as previously stated), and I think using a normal wooden frame and just the quote would have made it a lot easier, but who wants easy crafts?
That being said, I think this is a fab craft project to do with the kids, plus with this frame you could add any design you like not just a quote.
I hope this has inspired you to get creative with your Silhouette Machine.
Until next time!
– Victoria Yates xx –
• Design Used: Though She Be But Little Phrase
Design Store Artist: Kolette Hall
Design Store ID: 60845 > Download
• Design Used: Easy Change 9.5×9.5
Design Store Artist: Nilmara Quintela
Design Store ID: 293665 > Download