Toddler Summer Holiday T-Shirt | Helen Williams | Silhouette UK Blog
Toddler Summer Holiday T-Shirt
Summer is finally here!
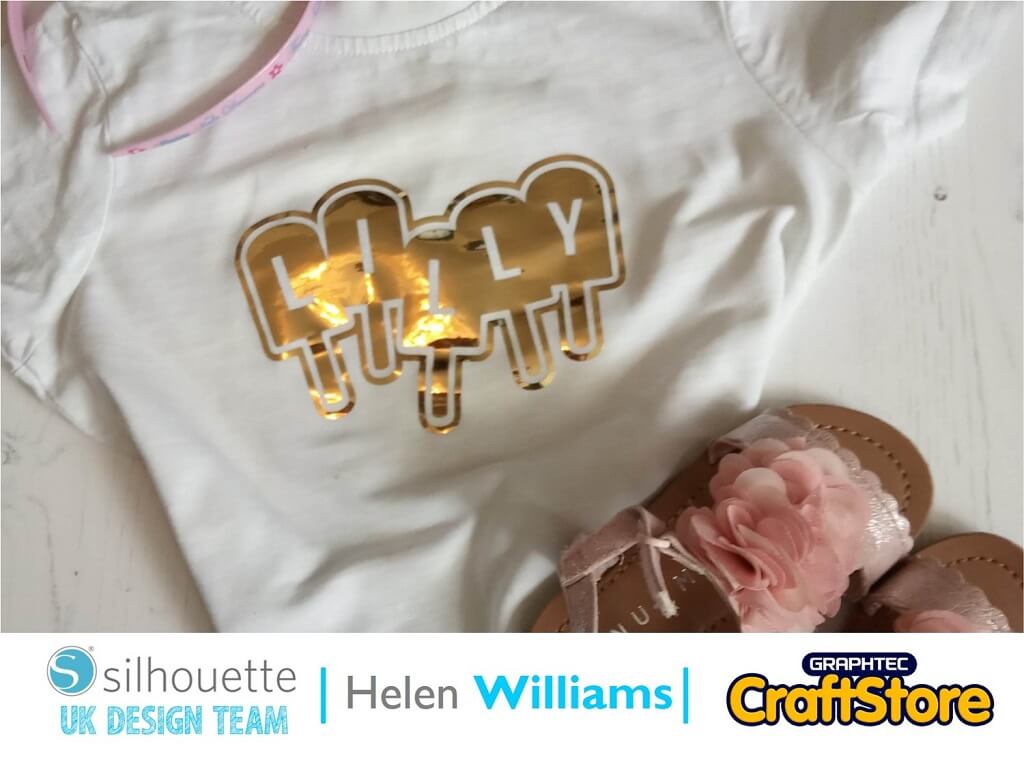
I am super excited to be able to bring you my latest tutorial on how to use this fabulous gold metallic heat transfer vinyl to make a cute child’s summer top.
Here’s how I did it.
How To Make The File: Step 1
The first step to making this file was to open the Popsicle alphabet file in silhouette studio. Each letter of the alphabet comes in two separate parts the ‘lolly’ part and the ‘stick’ part. For the purposes of this project I wanted them to be joined together. To do this I first ‘ungrouped’ the file whilst it was all selected. I then moved each ‘stick’ part so that it was slightly overlapping the ‘lolly’ part of the file. I then selected both parts and welded them together using the ‘weld’ tool.
How To Make The File: Step 2
Once I had welded all of the letters together I moved the letters I needed up to the top of the canvas and moved the rest out of the way. If you need any duplicate letters like I did then copy and paste them now.
Once I had all of the letters lined up in order I rotated the letters until they were all at different angles and then overlapped them. I then selected them all and welded them together to make one file.
How To Make The File: Step 3
I wanted to include a line around the file to really make it pop. To do this I used the ‘offset’ tool. With my file highlighted I opened the offset menu and chose ‘external offset’. I used this to create a line all the way around the design.
Once I was happy with how thick the gap was between the design and my boarder I clicked ‘apply’. I then selected just my new line and did a second external offset to create the two lines that will form the boarder. The file is now ready to cut out.
How To Cut The Design: Mirroring The Image
Once you are happy with your design you are ready to cut it. To do this load the material into your Silhouette machine with the gold side down. The instructions (which are on the inside of the wrapper) recommend using the material without your mat. I used the mat with mine and got a good result. When you load the material into the machine put it with the gold shiny side down so that you cut the vinyl and not the protective transfer plastic. I cut it out using the default metallic vinyl settings. This worked beautifully first time. Also make sure that if you haven’t already mirrored your design to do it when prompted in the Silhouette program. Once your design is cut out weed out the material in the negative space.
(Make Sure You Scroll To The Right For Both Images)
How To Iron On Your Design
If like me you don’t have a heat press you will need to get your iron out for this step!
You will also need a firm surface to iron onto. Put your t-shirt facing up with the vinyl on top so the design is the right way round. You don’t need to, but I always like to put some baking parchment over the design so that my iron doesn’t come into direct contact with the plastic, an old cotton pillowcase can work just as well.
Put the iron on a hot setting and press down firmly on the design for around thirty seconds. Then check to see if the design is sticking to the material. If it isn’t then press the design with the iron again. I always find that if you give the design a few seconds to cool slightly then it tends to stick better. Once it has stuck to the t-shirt peel the clear plastic off and give it one final press with the iron.
The T-Shirt Is Complete
This was a lovely little project and quick to create. I was also really impressed with the metallic heat transfer vinyl. I found it easy to iron on and the colour really popped and made the t-shirt look great.
Keep an eye open for my next blog post creating a cute star spangled scrapbook page. Thanks for reading, leave me a comment blow if you liked it!
Helen Williams
Silhouette UK Blog Created By Helen Williams
Silhouette Products Used
Silhouette Designs Used
• Popsicle Alphabet: Download
