New Year Chalkboard To Do List | Cherylann McCool | Silhouette UK Blog
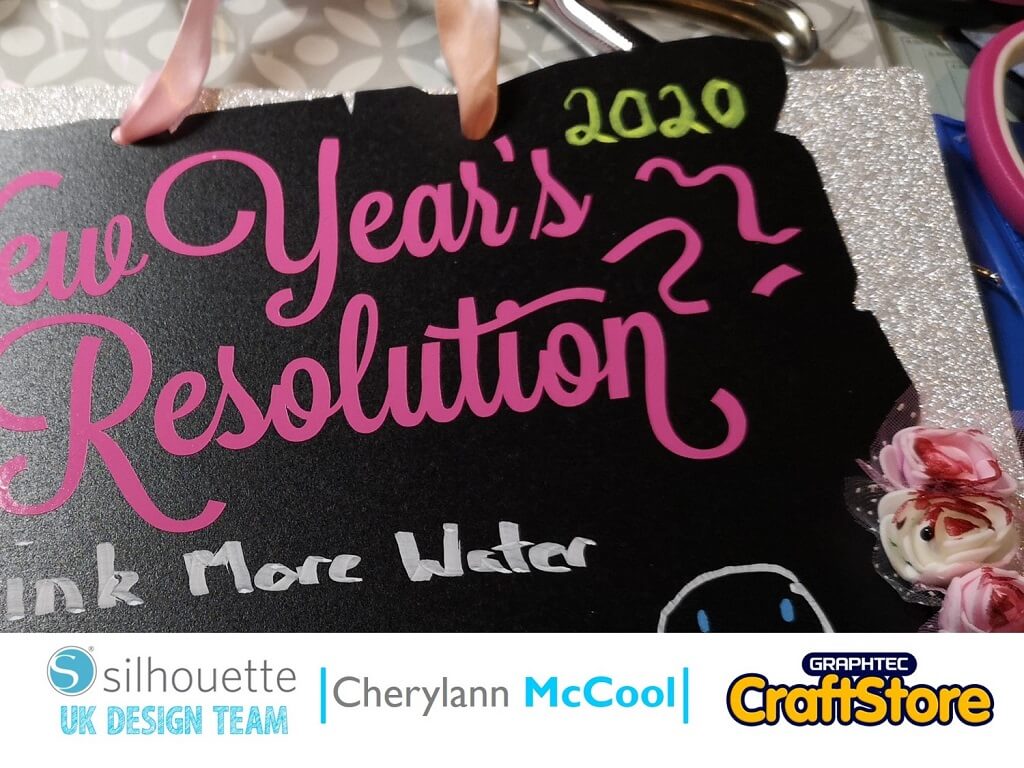
New Year Chalkboard To Do List | Cherylann McCool | Silhouette UK BlogNew Year Chalkboard To Do List | Silhouette Chalkboard Cardstock Hi Cheryl here again. Happy New Year to…
PLEASE NOTE THAT THE OFFICE WILL BE CLOSED FROM 12PM FRIDAY 20TH DECEMBER 2024 AND WILL RE-OPEN ON THURSDAY 2ND JANUARY 2025
ORDERS FOR DELIVERY PRIOR TO CHRISTMAS WILL NEED TO BE SUBMITTED BY 2.30PM ON THURSDAY 19THDECEMBER 2024.
ORDERS RECEIVED AFTER THIS TIME AND DATE WILL BE DESPATCHED ON THURSDAY 2ND JANUARY 2025.
Merry Christmas & A Happy New Year to all our customers. Thank you for your continued support.
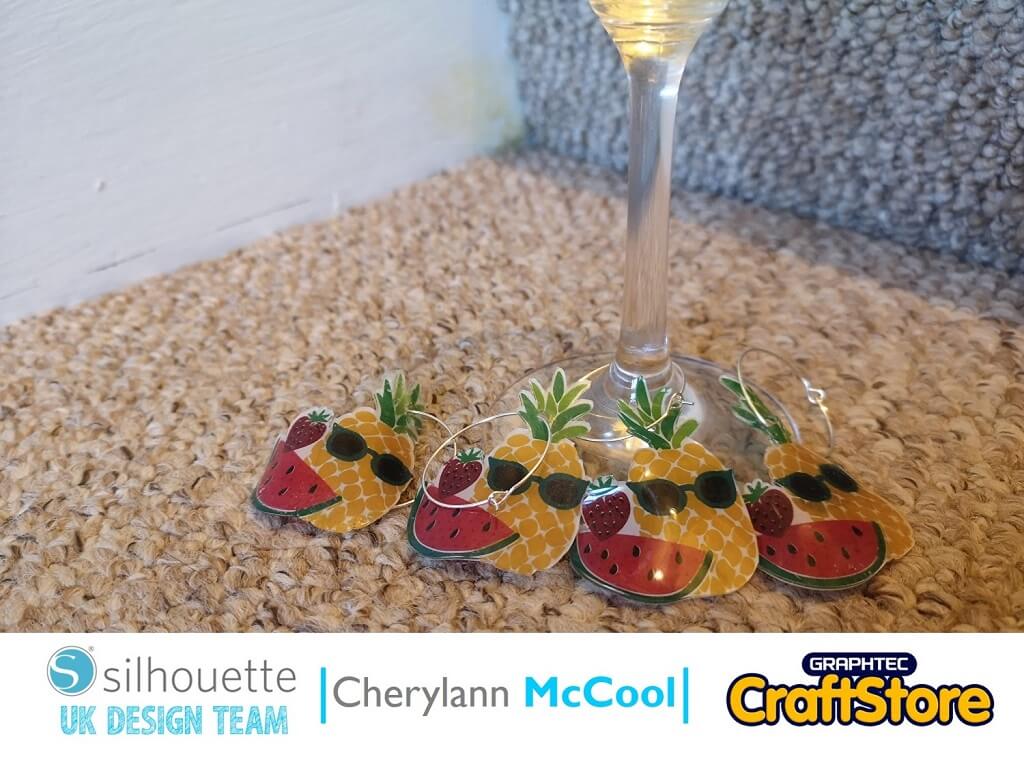
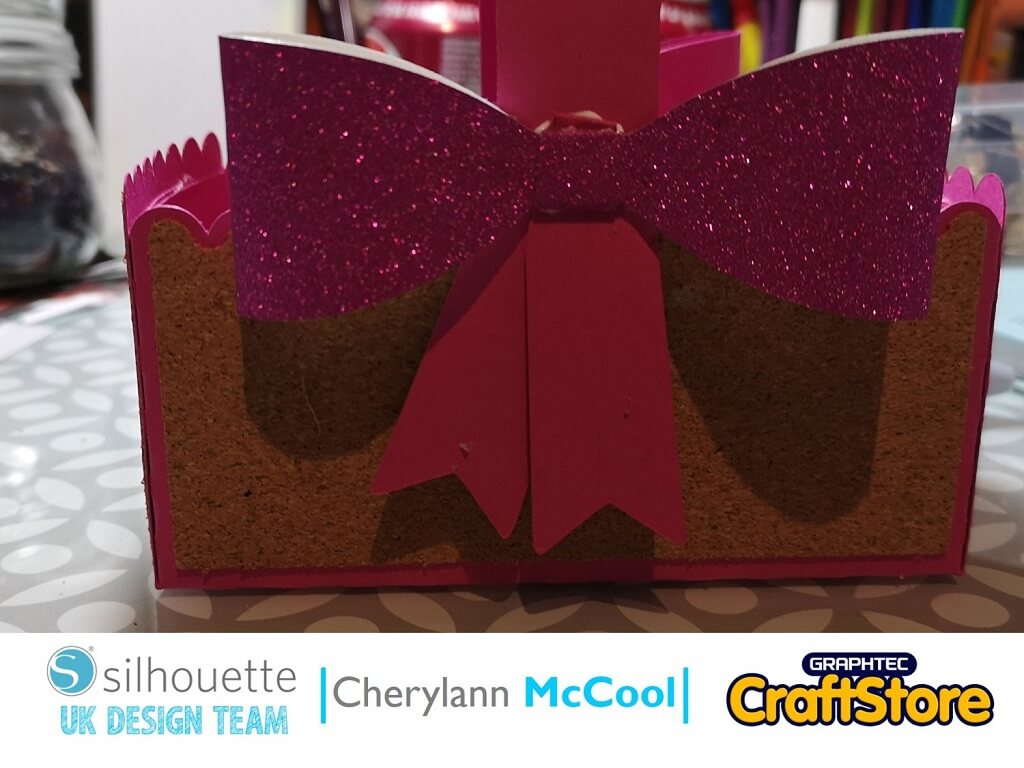
Hi it’s me Cheryl again, so let me guess you are getting ready to go on holiday whether home or abroad well I have the perfect project for you.
These can be put around your glasses and let the drink take you away to your perfect tropical place. This project is using Silhouette Shrink Plastic Sheets that can be used in your cameo’s.
Silhouette Shrink Plastic Sheets
Silver Wire Rings (Available With The Shrink Plastic Starter Kit)
With your software, open your design file and make sure when it loads your page setup setting is showing.
If it’s not you can get it to show by selecting it under the view drop down.
At this stage if you haven’t already done so, you need to make sure on the page setup that you change your size to letter size (8.5 x 11.0in).
You will see your workable space shrink.
Here you will decide on the size you want your image to be and you can do this by clicking to bring the black box and use the white boxes to resize.
Make sure you have selected all of the design for resizing.
(Make Sure You Scroll To The Right For Both Images)
At this stage you will know if you are doing more than one.
I chose at this point to do 4. To do this, go to Object then replicate and choose to duplicate right. I would choose to move them apart then duplicate and again make sure you put space between them.
(Make Sure You Scroll To The Right For Both Images)
Now that you have your images where you want them, go to view tab and select add registration marks and you should see the tab at the side.
On the style at the top, click on it and select Type 1 unless you don’t have those machines then select Type 2.
Once selected you will see your screen change.
With this design we don’t need the other options. Now, with your own printer print onto the Shrink Plastic Sheets.
(Make Sure You Scroll To The Right For Both Images)
Your sheet of Shrink Plastic will now look like this.
Now, load your shrink plastic onto your mat ensuring that the corner with the black printed square is at the top left handed side on the mat.
Once loaded, you will see the images have the red line on the outside of them that is how close you want your machine to cut to.
(Make Sure You Scroll To The Right For Both Images)
Now you want to press send and your screen will now look like this.
When selecting the material you want to change it to Shrink Plastic and then hit send and your machine will cut them out to look like this.
At this stage you will want to put a hole in them, I did this with a single hole punch.
Now get ready to bake it.
(Make Sure You Scroll To The Right For Both Images)
Preheat your oven to 160 degress and lay your images out on parchment paper tray with plenty of room between them.
Place the tray into the oven and watch them as they shrink right up close then they will start to lay back out flat but the adhesive back releases itself.
Now it’s time to bring them out of the oven. Make sure you have an acrylic block and lay the block on top of them to allow them to go flat, you can now finish your project.
(Make Sure You Scroll To The Right For Both Images)
Well, this is my first time using this media and would definitely use it again and I think you would have lots of things to create with them.
It was a little stressful for me but as it turns out if you don’t change your media size to letter then you will have the same fun as me.
I have started my next project which is so cute and it would make a small gift to say thank you.
Here I will bow out and say thank you for following me and I hope you will follow me for my next one.
– Cherylann McCool –
• Summer Fruit (ID: 271645): Download