Faux Leather Notebook | Sharon Nettleship | Silhouette UK Blog
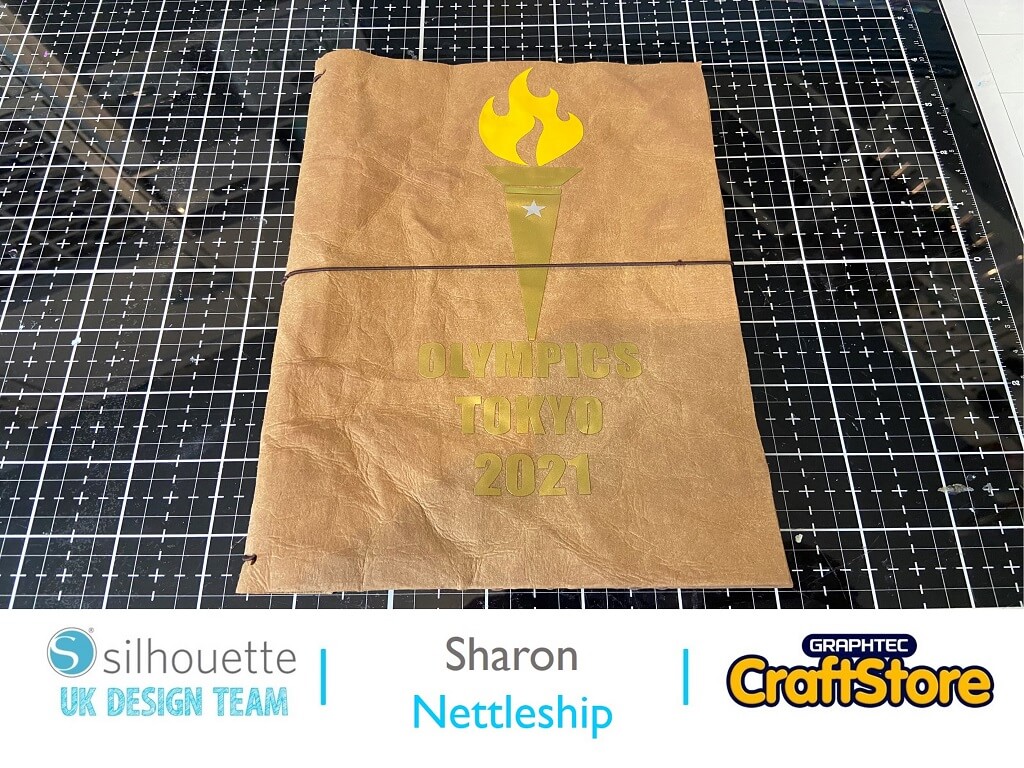
Faux Leather Notebook | Sharon Nettleship | Silhouette UK BlogA5 Olympic Notebook Hi, DT Sharon here today! I was really interested to try using the Silhouette Faux Leather paper. This…
PLEASE NOTE THAT THE OFFICE WILL BE CLOSED FROM 12PM FRIDAY 20TH DECEMBER 2024 AND WILL RE-OPEN ON THURSDAY 2ND JANUARY 2025
ORDERS FOR DELIVERY PRIOR TO CHRISTMAS WILL NEED TO BE SUBMITTED BY 2.30PM ON THURSDAY 19THDECEMBER 2024.
ORDERS RECEIVED AFTER THIS TIME AND DATE WILL BE DESPATCHED ON THURSDAY 2ND JANUARY 2025.
Merry Christmas & A Happy New Year to all our customers. Thank you for your continued support.
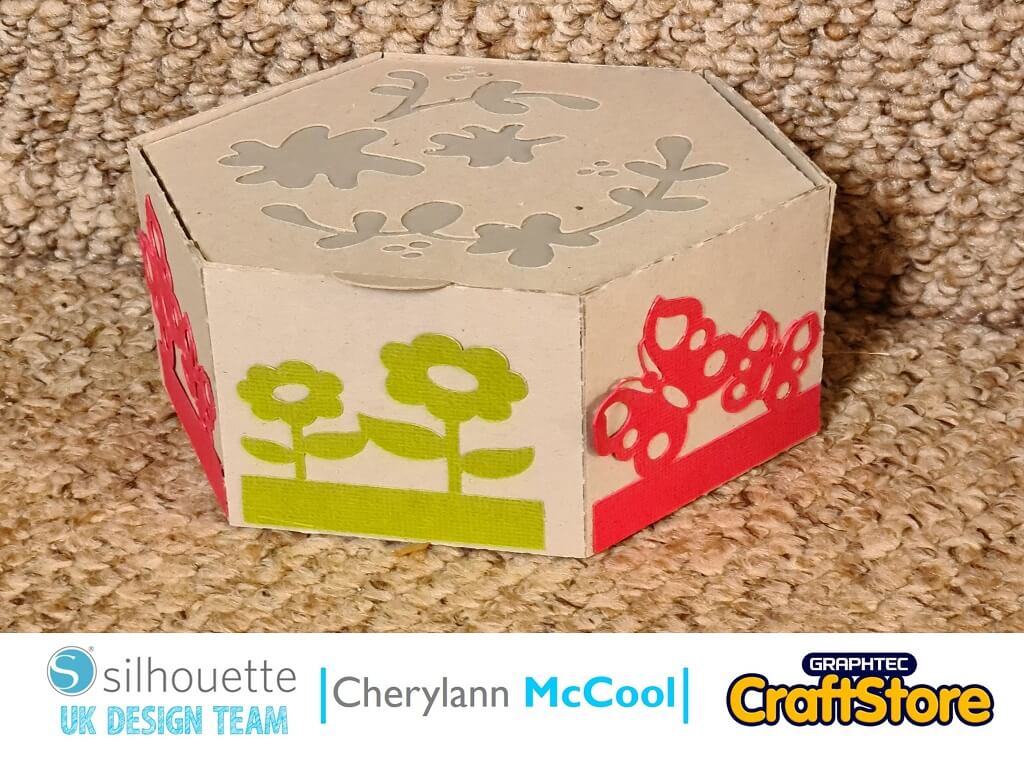
Hi it’s me Cheryl here again.
The holiday season is underway with most choosing staycations and it’s nice to see.
The schools have finished here in Scotland so the weather will probably change.
Lets take a look at this week’s project and it’s fun to make, so let’s go and start crafting.
• Silhouette Chipboard
• Silhouette Cardstock
• Velum
• Glitter Glue
• Adhesive Gems
• Strong Glue

In your software open your file in the design space and you will see that your file appears on the virtual cutting mat.
Now you have to decide on the size of mat you will need to use.
I recommend using the 12″ x 12″ mat size if you are using a Cameo machine.
You can choose to cut the box the size as is but if you would like to make it bigger then all you need to do is click on the design to put black box around your file and then drag the bottom part of box onto mat.
Then with the little white boxes drag until you get size you want. You can do this also if you want to make the box smaller.


If you are happy with the size then put your chipboard onto mat and load into your machine then on your screen hit the Send button.
Here you will see the screen change now you want to change your material to ‘Chipboard’ and you will see the settings change and then if happy hit send once again to begin cutting.
Once the bottom box has been cut you can follow the steps above for the top box and the vellum piece but you will not need to change the size.
And remember when going to cut the Vellum change the material to Vellum.


Now you have all your pieces cut it’s time to put our box together.
Start with the bottom and fold all the dotted lines. Once folded, you need to glue the folds at side onto the piece next to it and with the top folds, glue them against the piece they are from.
Once gluing is complete, put to one side to dry.
Now with the top box I would glue your Vellum to the underside making sure you don’t glue where the pieces have been cut.
Now you want to do the same with the pieces on the top lid but DO NOT glue down the tab that’s not on a bigger piece.
That piece needs to be glued against the piece on the bottom box that has a straight edge.


Now you can put the top box into the bottom box with the tab out so you can pull it up and push down.
Now you can decorate your box, I used a garden border set from the Silhouette Design Store and cut them up to fit the outside of the box.
On the top where the elements have been cut out you could use glitter glue here.
Your box is now complete.

That was so much fun to make and a lovely box when finished.
It could be used for many different things but I think would make a perfect little favour box for a wedding or a bridesmaid gift.
Well, I hope you will come and join me on my next project where we will be making an inspirational item that can be a gift or kept for yourself.
Have a great week!
Bye for now!
– Cherylann McCool xx –
• Design Used: Vines & Flowers Hinged Gift Box
Design Store Artist: Sarah Ehlinger
Design ID: 74553 > Download