Guitar Gift Box | Helen Williams | Silhouette UK Blog
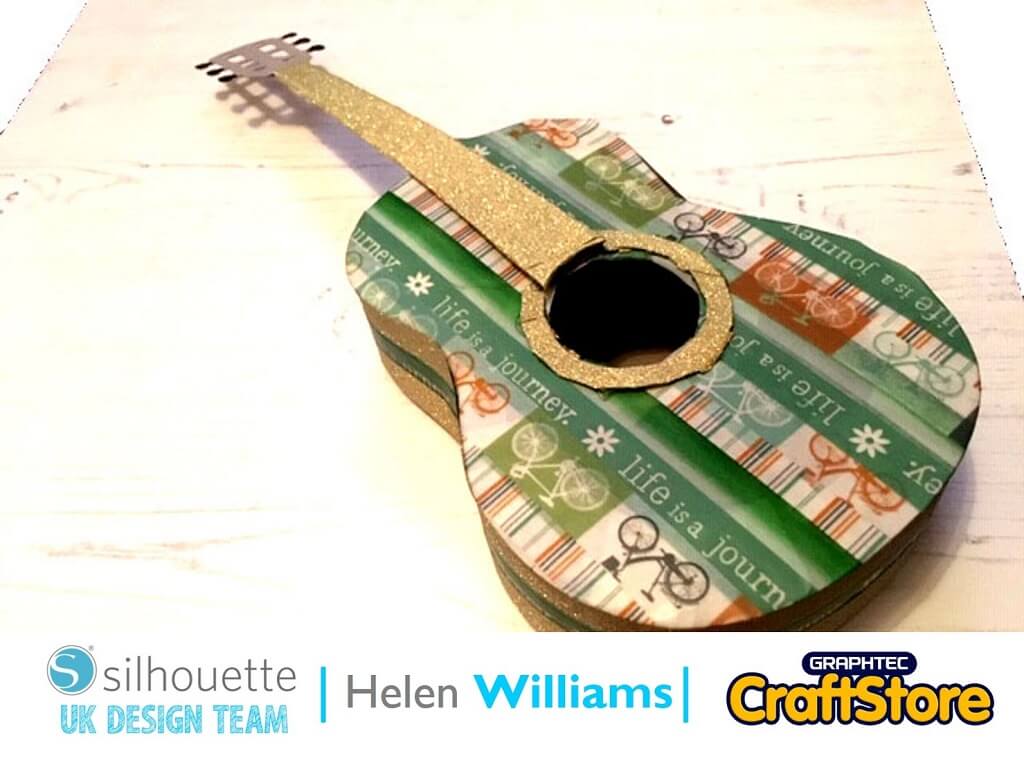
Guitar Gift Box | Helen Williams | Silhouette UK BlogGuitar Gift Box | Using Silhouette Chipboard Sheets In today’s blog post I will be creating this cute guitar shaped gift…
PLEASE NOTE THAT THE OFFICE WILL BE CLOSED FROM 12PM FRIDAY 20TH DECEMBER 2024 AND WILL RE-OPEN ON THURSDAY 2ND JANUARY 2025
ORDERS FOR DELIVERY PRIOR TO CHRISTMAS WILL NEED TO BE SUBMITTED BY 2.30PM ON THURSDAY 19THDECEMBER 2024.
ORDERS RECEIVED AFTER THIS TIME AND DATE WILL BE DESPATCHED ON THURSDAY 2ND JANUARY 2025.
Merry Christmas & A Happy New Year to all our customers. Thank you for your continued support.
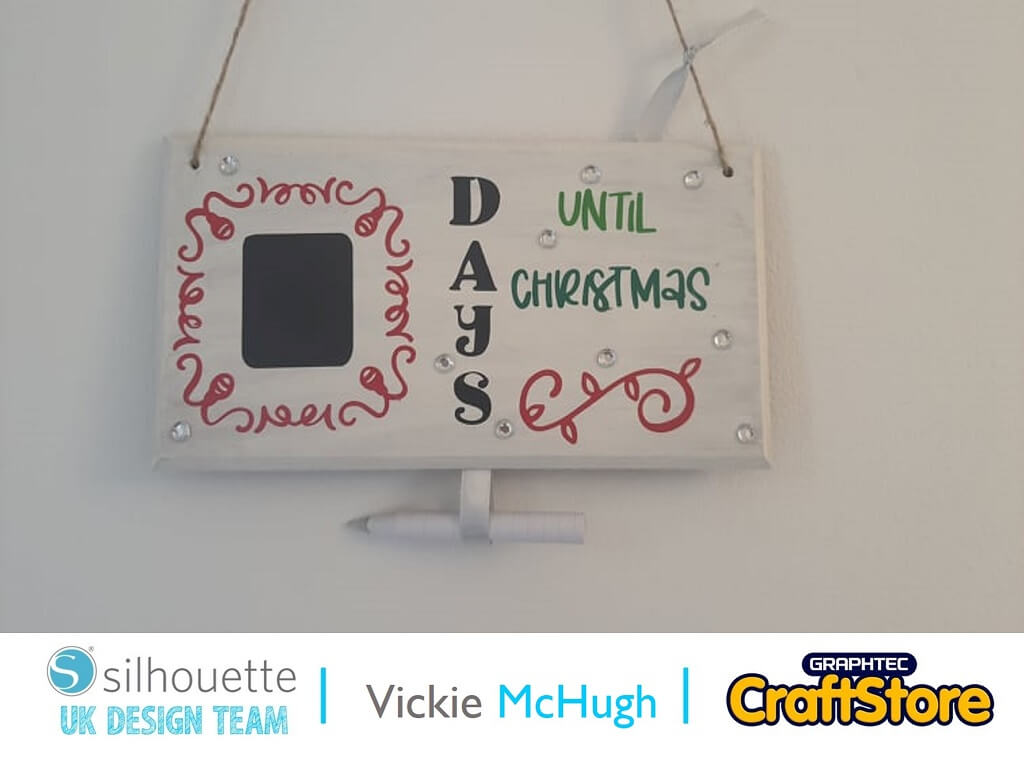

With the arrival of the naughty elf and 1st December around the corner, I thought I would show you how to create a Christmas countdown plaque using some of the Silhouette Chalkboard.
For this tutorial, you will need:
Items I Used
• Silhouette Chalkboard Starter Kit
•Graphtec Glossy Vinyl Bumper Pack
•Silhouette Curio
•Ratchet Blade
•Wooden plaque
•Twine

I have purchased a small wooden plaque and painted it in white acrylic paint.
Then in silhouette Studio, map out the plaque using a rectangle.
This is so you can size up the vinyl and chalkboard.
My work space is 7.5” x 3.5”.
Having looked in the Silhouette design store, there were so many Christmas designs but I chose “days until Christmas”
Insert the file into silhouette studio by double clicking in your library.
I have decided the change the layout of the words, so I have ungrouped them by right clicking.
I have then arranged them how I want them to be on the countdown plaque and have also drawn a rectangle, which is where the chalkboard will be.


Now that the design has been sized according to the plaque, delete the rectangle.
I am using different coloured vinyl for different sections, so I am going to move bits of the design to different sections on the mat.
Once you are happy, click send.
I am using 2 different types of material, chalkboard and vinyl.
First I am going to cut out the chalkboard.
Make sure all other designs are greyed out and set the material to Vinyl, Chalkboard, click send.
Once that has been cut, select all the other pieces to be cut and change the material to Vinyl, Glossy and click send.
Once you have all your cut out pieces, weed the design and remove all of the excess vinyl.


Once you have weeded the vinyl, lay it out on top of your plaque to make sure everything is in the right place.
Then secure the vinyl in place using a Silhouette scraper tool.
I have then added some gems, a twine hanger and a cute little bow.
The possibilities are endless with your Silhouette Mint.
Why not have a look in the design store and create a santa seal for your Christmas envelopes? Or maybe use a larger stamp and put your whole families hand writing on there?
Please don’t forget to tag me on Instagram so that I can see your masterpieces @crafty_vickie
– Vickie McHugh –