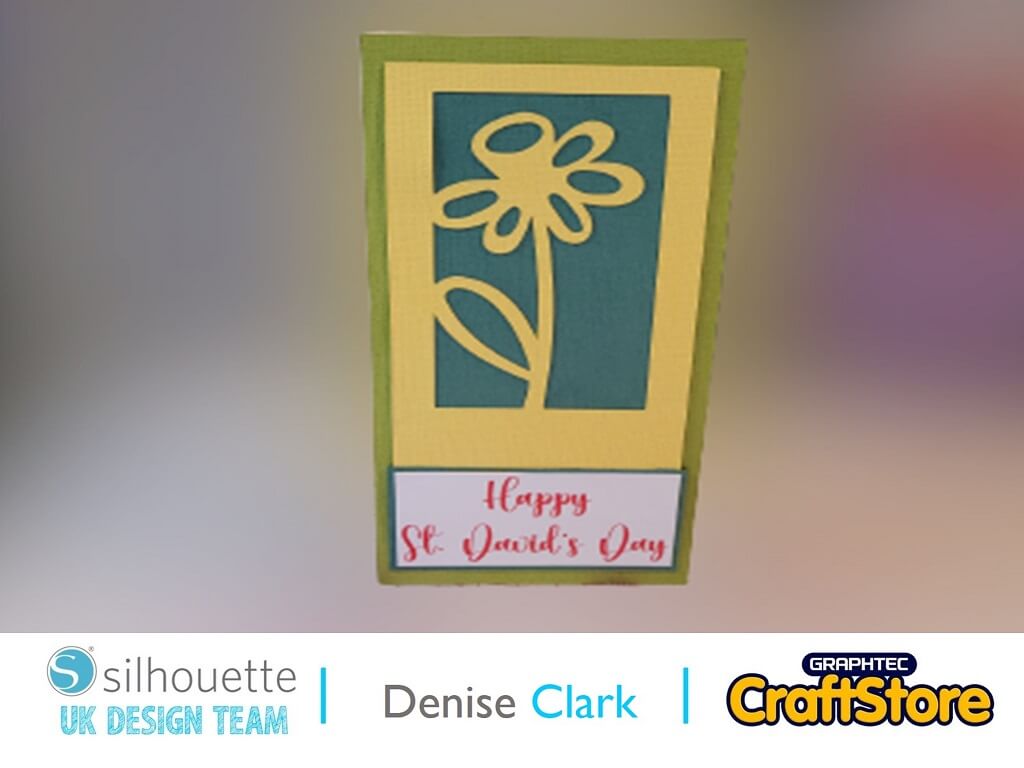
How To Create A St David’s Day Card
Today’s Blog is about making a card for St. David’s Day. A simple but effective card. I have a bag of cut-offs of the adhesive backed card, so these were great to use to make the card. Why don’t we get down to it and make this card!
Materials used:
Adhesive Backed Card
Craft knife and ruler
DL Card
Open up your software and go to top right hand corner and click on library and look for your project your working on then click on it to open it up on your design space.
You will see that there is 2 designs here so click and drag over the design your not wanting and delete it by right click and scroll down to delete and click on it you will see it no longer there.
Don’t worry you haven’t lost the file for good.
I’m using adhesive backed card so go to your send button top right hand corner and click on it this is where all the info you need to cut your project on the media your using. Under carriage 1 is all your settings for your media.
Scroll down for the media your using which today we using adhesive backed cardstock click on it and the rest of the setting is all set for you you don’t need to do a thing!
Load your media onto your cutting mat and load into your cutting machine and then press send at the bottom and that will do all your cutting for you.
I have a DL card put aside for this project.
I lay my project onto another piece of card different colour and I cut around it so it was giving me a backing colour just for the design.
I put them aside and I got another piece out a different colour and put on the DL card.
I took the backing of the card off as its adhesive backed put it on the shape I cut out and stuck them together by adhering them together, then peeled of the backing and adhere it to the main card
I used the print part here for printing Happy St. David’s Day which I done by clicking on the Letter A down the right hand side then I clicked on letter A down left hand side and clicked on design space so I can write it once I was happy with it I clicked on the right hand side letter A this brings all the fonts up so today I have chosen Biscuits regular font.
I printed it off by clicking on the printer icon on top left hand corner and that brought up the box for print settings I printed onto card go by what your using for settings for your printer for the media your using then print it off
I cut the St. David’s day out buy using my craft knife and ruler then I adhere it to piece of card that was left and trimmed round it so there was a little border going round it and adhere it to the DL card now your project is all done.
This project was lovely to do although it was simple it was still effective and it brought a smile as it made me think of the daffodils that are starting to come out I love seeing them.
And the Daffodil flower was just right to make for St. David’s Day.
Hope you enjoyed this quick but effective card and pop back for my next blog which is going to be about Mother’s Day
No results found.
Design Store Design Used :Flower Icons
Design Store Artist: Sweet Afton
Design ID: 9052


