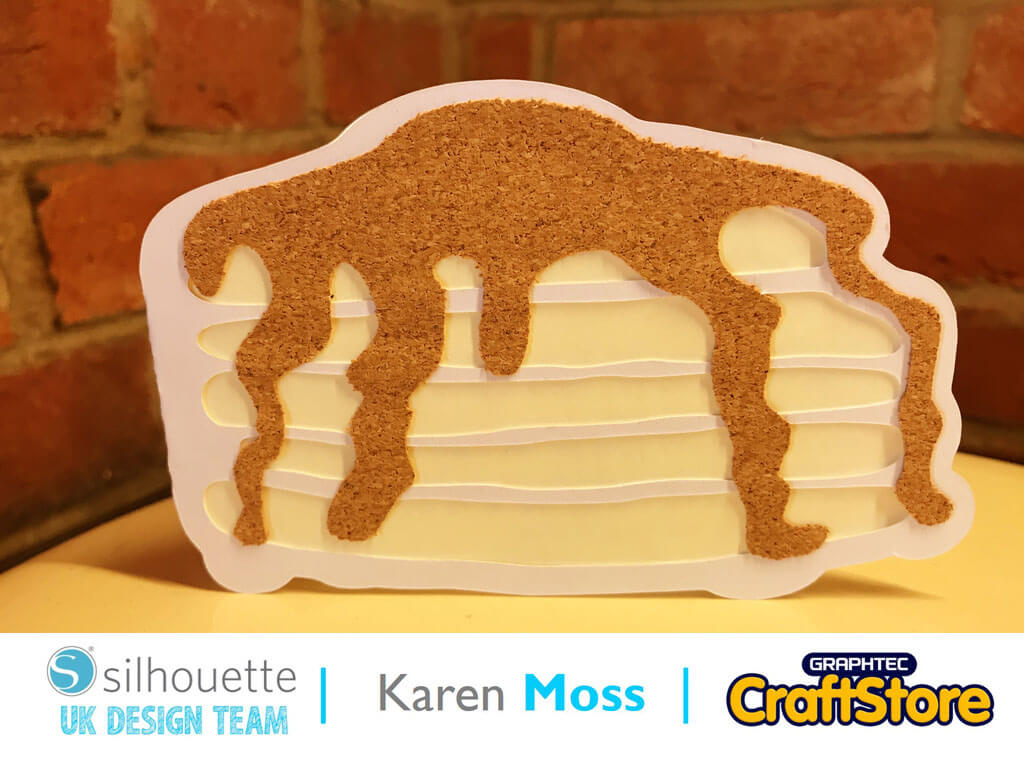
Pancake Day Cork Card | Karen Moss | Silhouette UK Blog
Pancake Day Cork Card | Karen Moss | Silhouette UK BlogPancake Day Card | Silhouette Cork Sheets This week we have been tasked to use cork sheets with a Pancake…
PLEASE NOTE THAT THE OFFICE WILL BE CLOSED FROM 12PM FRIDAY 20TH DECEMBER 2024 AND WILL RE-OPEN ON THURSDAY 2ND JANUARY 2025
ORDERS FOR DELIVERY PRIOR TO CHRISTMAS WILL NEED TO BE SUBMITTED BY 2.30PM ON THURSDAY 19THDECEMBER 2024.
ORDERS RECEIVED AFTER THIS TIME AND DATE WILL BE DESPATCHED ON THURSDAY 2ND JANUARY 2025.
Merry Christmas & A Happy New Year to all our customers. Thank you for your continued support.
Hello crafters!!
Vicky here from Cut That Design!
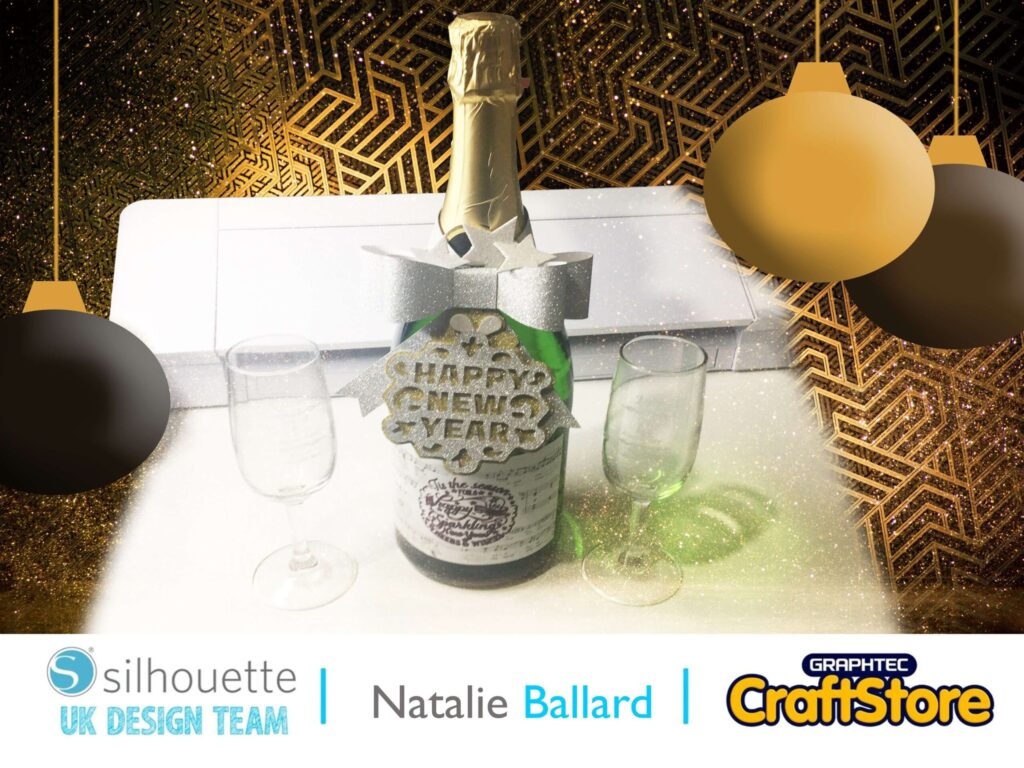
New Year’s Eve will be different for all of us this year, but that does not mean you can’t celebrate and decorate your home to see in the new year!
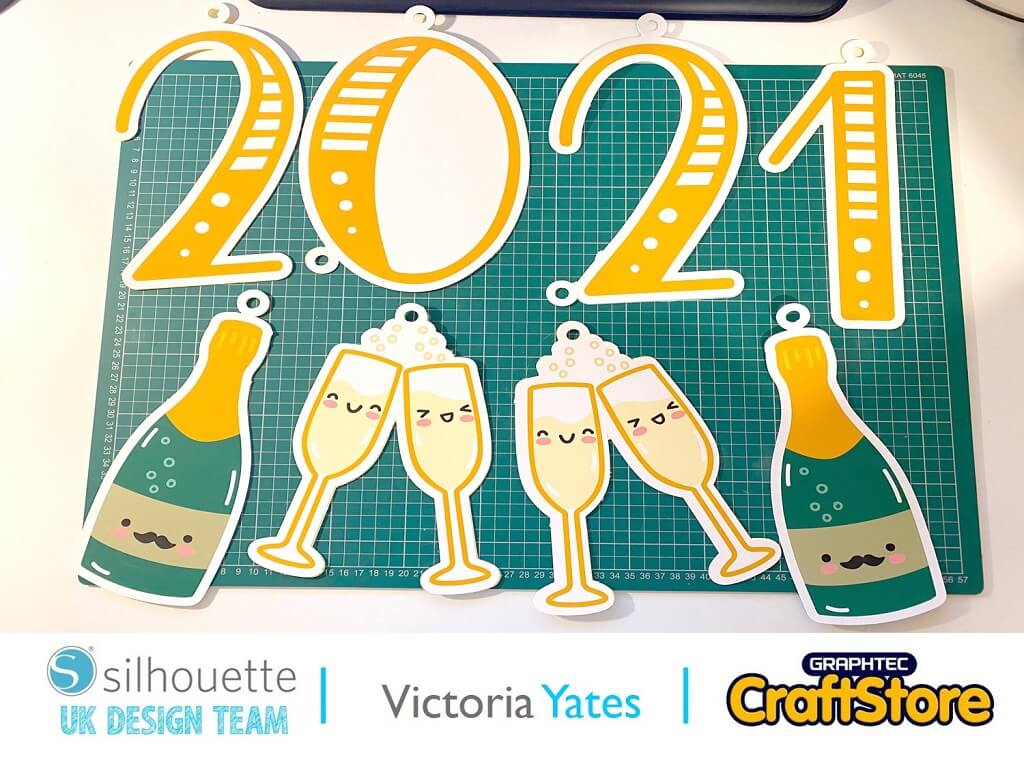
For today’s blog post I have made this 2021 banner using the print then cut method with Silhouettes Printable Adhesive Cardstock.
Items you will need:
• Silhouette Self-Adhesive Vinyl
• Regular Cardstock For Backing
• Gold Ribbon
• A Printer

First off, I downloaded the files I wanted to use from the Silhouette Design store and opened them in Silhouette Studio!
I adjusted my page settings to the size if the media I was using. I also added the registration marks, the print border, and the cut border.
I then adjusted the size of the Champagne bottle and the glasses to the cut border.
Using a font from my font library I typed 2021, I then adjusted each number to the same size as the Champagne bottle and glasses.
I wanted to add a white border around the designs and font, so using the offset function I added an offset of 0.25.
I then Duplicated the Champagne and glasses.


For this next step I have added ribbon holes to the offset layer created in step 2.
I took the following steps to do this.
Image 1: I made a 1cm circle, I then created an offset of 0.25.
I selected both circles, right clicked and clicked on ‘Make Compound path’ from the menu.
Image 2: I then duplicated the circles 10 times, as I added 2 extra holes to the ‘0’ and ‘2’, as shown in Image 4.
Image 3: Next I positioned the holes to where I wanted them to go on the offset layer (as shown). I then selected both the hole and the offset layer, right clicked and selected ‘Weld’. I then grouped the offset layer to the main front layer.
Image 4: I repeated the same step for all the other designs.
Once this was done, I again had to adjust the each design to fit within the cut area. Making them all the same height.
I Positioned the first design within the print and cut area and sent the design to my printer, adjusting my printer settings accordingly.


Once printed, I placed the print on the cutting mate and loaded my Silhouette machine and applied the cut settings.
I used the default settings set by Silhouette.
I repeated the same steps for all the other designs.
Once they were all printed and cut I removed the excess card leaving just the design on the backing sheet.


When I finished cutting I realised that I would need some kind of backing, otherwise it would have a sticky back!
So I cut out the offset layers of each design again on some yellow cardstock, and attached it to the back of each of the cut outs.

To finish off I added some gold ribbon (the ribbon used for balloons) and attached it to my fireplace! I kept the excess ribbon attached as I think it looks like fireworks and adds to the design.
So, there we have it, I’m over the moon with how this turned out. Oh, and I have taken the banner down until new year don’t worry!
Why don’t you have a go at making your own New Year banner using designs from the Silhouette Design Store?
Until next time, whatever we may be allowed to do for New Years Eve, I hope 2021 is a better year for us all.
Happy New Year!
– Victoria Yates xx –
• Design Used: Kawaii French Champagne Bottle & Glasses
Design Store Artist: Little Luzuries Loft
Design Store ID: 295724 > Download