Chalkboard Baby Card | Cherylann McCool | CraftStore Direct Blog
Chalkboard Baby Card | Silhouette Chalkboard Vinyl
Hi Cheryl here again.
Just back from my holiday up the highlands with friends and our gorgeous bichon pups and what fun they had playing with each other and other dogs.
I am guessing and hoping by the time this goes live that someone knows whether it’s a boy or girl.
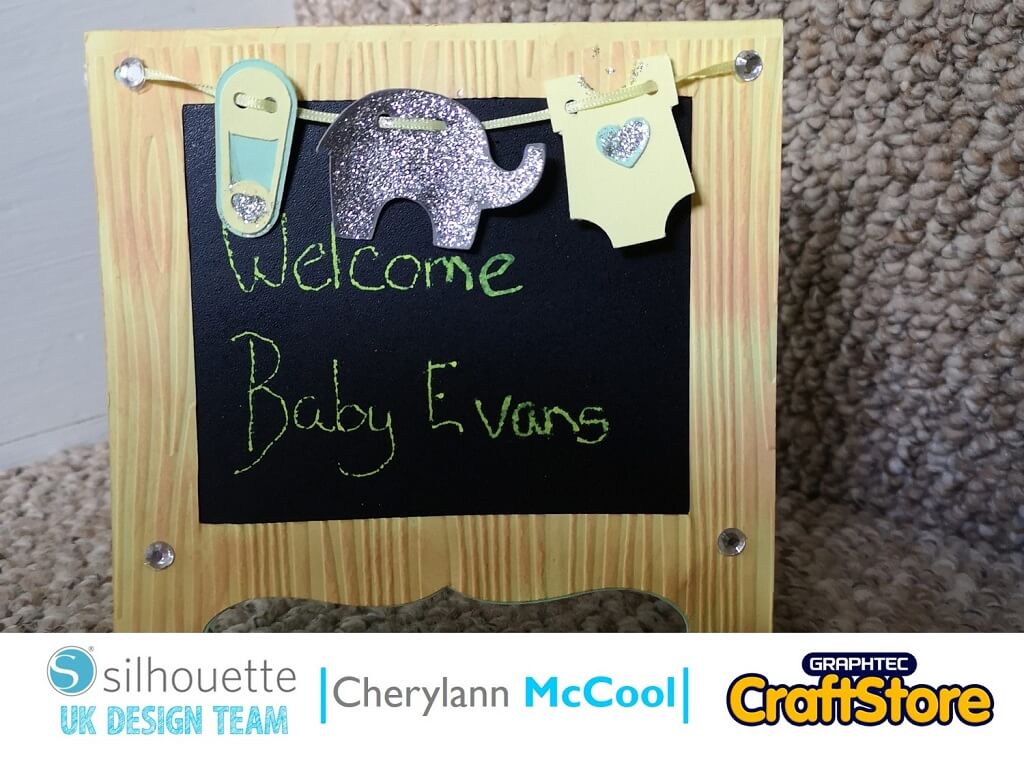
I had to go with neutral colours which is perfect and I think this card made with blackboard vinyl is cute and could be adapted for anything but let’s see how this ends up looking.
Craft Materials Used
• Silhouette Premium Chalkboard Vinyl
• Cardstock
• Wet Glue
• String
• Embossing Foil
• Inks & Chalk Pen
Open Your File
In your software open your file in the design space and you will see that all the pieces fit on the 12 x 12 inch mat which means you can cut out all the parts on one sheet with very little waste.
Preparing To Cut
Before cutting you need to ungroup then hit enter so that you can move the square out to be cut with the blackboard vinyl first.
Make sure that you change your mat and change your material to Vinyl Chalkboard with a speed setting of 10.
Now hit send to cut and when complete put to one side.
(Make Sure You Scroll To The Right For Both Images)
Cutting
Back at your design space, add the square back with the other bits and then add everything back on to the 12″ x 12″ mat and do the same step as the blackboard vinyl except on the send page change material to cardstock.
Move the blade to 4-5, speed to 10, force to 33 and passes to 2 (dependent on thickness of card used) then hit send.
Colouring
Now with all the bits cut it’s time to put it all together.
To put the blackboard vinyl on you need to remove the backing and lay the card out with the inside down on the table.
Where the window, is put the blackboard vinyl over this bit and then with the single blackboard you can put it through an embossing folder to give it some texture
Now, colour it and add it on top of the blackboard vinyl.
(Make Sure You Scroll To The Right For Both Images)
Folding The Cardstock
To begin folding you want to put the square at the back of the vinyl so that it is inside
Now to make up of the baby items with wet glue and decorate. You can add colour or cut in different colours. With the holes in the card add a piece of string or ribbon and tie a knot at the back to hold the ribbon in place.
Place the ribbon through the baby items and do the same at the other end of the string.
Finally, with a chalkboard pen you can put a message on the front.
(Make Sure You Scroll To The Right For Both Images)
Welcome To The World
I absolutely loved this project as it was so easy and so much fun to complete.
I made it to be a surprise for someone in the Graphtec UK office and was so excited to hear what the baby is called.
Well, that’s me for this week folks, see again in a few weeks.
– Cherylann McCool xx –
CraftStore Direct Blog Created By Cherylann McCool
Products Used
Silhouette Designs Used
• Design Used: A2 Chalkboard Baby Easel Card
Design Store Artist: Lori Whitlock
Design ID: 62412 > Download
